Tag Archives: art 1

2 Philosophies, 1 Program

Standard

I wanted to take a moment to talk about my program. As many of you know, I am a TAB (Teaching for Artistic Behavior) teacher and have been for the majority of my 15-year career. What I am not sure people know is that my partner is not a TAB teacher. Yes, he sometimes gives choices to his students, our students, but for the most part, he is a traditional art teacher who assigns whole-class projects.

We have been working together for 15 years, and it has taken us 14 of those years to finally get our act together and create a program that not only allows cohesiveness for our students, but also allows for each us to teach to our own philosophy and to our strengths.

What does this look like? We were fortunate to have had a principal who trusted us as experts and allowed us to choose which class levels we wanted to teach. We both teach Art 1 classes due to the sheer number of class sections we have. (Texas requires one fine art credit for graduation, and the majority of students pick art as that FA credit.) We split the Art 1 sections as evenly as we can. The experiences for the students in our respective classes is different, but we are okay with that. The students get to know us as teachers and people, they get to learn about our program, they get to make some art, they have fun, and for about half, they get that credit they need so they can move to the pathway they are really interested in.

It’s when the students decide to continue in the art pathway that things really start to make sense for how we have structured the Duck Art Program. We have split the remaining sections of courses by levels between us. My partner teaches all sections of art 2, I teach all art 3, then the seniors return to him for art 4 and AP Studio. He teaches both AP 2D sections. I teach AP 3D, but I am also the ceramics teacher, so that is what makes sense for us.

Splitting the classes this way works to our strengths. He is really good at teaching techniques and materials, so the art 2 students benefit from all having this shared experience where they get to focus on skills and learning new materials. They come to back to me in art 3. We focus more on the ATP (Artistic Thinking Process), studio habits, and creating original art. My class helps them to really consider content and finding what media they like to work with, what types of subjects they like, and what they want to explore. AND they really start to find and develop their voice. So…..when they return to Art 4/AP, they have a well-rounded background and can create amazing art. It was hard in the past to have kids that were all over the map because we taught the same level in totally different styles. I understand that as a TAB teacher, I always meet students where they are, but this isn’t about meeting students at their artistic level, this is about the students have a common base knowledge that allows both teachers to better meet the students needs.

It took us forever to learn to play together, and play together well, but better late than never I say. I am excited for this coming year because we will be able to really see how well this will benefit our students and our program. It was time to stop being an island in a department of 2 and instead come together as 1. It is possible to work with those that don’t follow a TAB philosophy like you do. You just need to check your ego and remember what is really important and the focus of your art program–the students and helping them in their journeys to becoming artists.

A Week of Clay Exploration

Standard

I’ve been a TAB teacher now for more than half my teaching career, and even I still struggle sometimes with creating exploration camps for my students that are open enough to give kids a taste of “new” mediums. One of these that I struggle with is clay. I know, I know, I teach ceramics, how could I struggle with this one? Giving students a week and a half to explore a medium that takes practice to understand is hard. I wanted to give them as much freedom as I could, but still limit some things due to practical aspects such as the amount of clay I have and the many students I have.

I had planned just on letting 2 of my 4 classes explore, but then decided I was too lazy to have 2 different explorations going on at the same time. And, I’m glad that I had all of them explore. Out of my almost 100 students, I had 95% engagement all week. I had about 3 kids decide they never want to touch clay again and I had several kids say they are signing up for ceramics next year–kids that I thought would stick with our 2D path. So, bonus for me and my program.

How did I run the exploration camp? I showed 2 quick demos on Monday, pinchpot and coil, with lots of finished examples of pieces created using those methods. Then on Tuesday I showed slab building. We talked about the term vessel, a hollow container, and how I was very open to how they could interpret that term. Then I let them go. They were to build a vessel of their choosing with any hand-building technique or combination of them they wanted.

If you have a lot of kids working at once, I would advise creating some damp boxes to help store as the kids work all week. See this post on how to create a damp box. It was a game changer on storage and keeping 90+ pieces workable all week. And, over a weekend for the handful that needed/wanted more studio time. I had been wanting to make some for my ceramic students, but never had time. This week forced me to make them. So glad I did.

I don’t have many pictures to share this time as we were having so much fun, I got caught up and forgot to pill out my phone.

Printmaking Exploration

Standard
Printmaking Exploration

I decided to start the second semester off with some good old exploration.  I was going to jump right into my “Artists Steal” unit (appropriated from Apex HS), but then I changed my mind and thought we needed to get messy for a week and a half.

We don’t have a printing press at school, so that limits what we can do.  However, that didn’t stop me from coming up with 6 different techniques involving making prints.  I got this idea from Cynthia Gaub and her art around the room activities.  The students would be asked to explore 5 out of 6 techniques and reflect on each technique.

I set up the counter with the 6 different “stations”.  We would learn about block prints (with EZ cut), collograph, stamping, styrofoam plates, monoprinting, and faux screen printing.  I laid out the week and a half in a short PowerPoint, explaining I would only do demos for cutting blocks, inking plates/pulling prints, using the gelatin plate for monoprints, and how to set up the screen for screen prints.  For the other techniques, the students would have to rely on the example cards I had created the year before.  Some of it required some thought on their part on interpretation of the card.

The students were asked to reflect on their findings of each technique.  They could either write their answers in their journals/sketchbooks or they could start a new BlendSpace lesson and reflect there.  I gave the students 7 questions to choose from…they have to answer question #1, then pick 4 from the remaining 6.

  1. What was the medium/technique explored?
  2. What qualities/characteristics does the medium/technique have?
  3. What makes the medium/technique different from a similar medium/technique?
  4. What did you like the best about media/technique and why?
  5. What did you like the least about media/technique and why?
  6. What could you use this medium/technique for?
  7. What other information would you like to know about this medium/technique?

My favorite part was reading the variety of questions they had for #7.

  • How is this art? (re: screen printing)
  • Is there an easier way to reverse when doing blocks?
  • Could block printing be done on a larger scale?
  • Was styrofoam printing invented by someone on a budget?
  • Who came up with block printing?
  • How do you add multiple colors?
  • What can you do with the collagraph technique?
  • Why is it called collagraph?
  • What is the right amount of ink?
  • How do you keep ink from getting on certain points on the styrofoam plate?
  • What other tools can be used to dent into the styrofoam?
  • How many layers can you do on a monoprint?
  • Do people really use the collograph technique and make a living with it?
  • How can you draw cleaner in the styrofoam?

Here are my thoughts on this activity:

I really think this could be a good way to explore different ways of printmaking.  While I showed the students some examples of final pieces, I don’t think I really let them know “how” different type of printmaking could be used.  They tend to think that each technique must be used alone and don’t consider mixed media, texture, background, layers, etc.  So, I would figure out a way to bring that into the activity for next year.

When it came to leaving some of the work to them…  relying on the example cards I had created the year before, I was hopeful that they would figure it out…I was wrong…most didn’t and they ended up asking me.  Sometimes they didn’t even try to look at the cards and make some educated guesses at what the process was.  This was frustrating to me as part of my philosophy does have the expectation that the students are responsible for their own learning and that I won’t spoon feed them.  I know they are high school students, but that can’t be their excuse for everything.  I did find myself smiling when I would hear a student asking another student.

I think perhaps I could show some videos or require them to watch a video as part of each station so they could see other artists use the technique or see what it could be used for. Then, they could use that as well for more informed reflections of the techniques.

My other thought, and this happens every year since moving to TAB, is how to get kids to actually use printmaking/stamping in their artwork.  Do they really not like it?  Do they not see it as an artwork?  Do they (the students) see it as too much to add to their process when art making?

I will continue to do this Printmaking Exploration Activity, but I will make some needed adjustments to enhance the learning and the take-aways from the activity.  One adjustment might be some requirement of what they need to create from the prints…so they put more thought into what they are doing.

Since originally writing this, I did have one student revisit monoprints and the gelatin plate.  She really enjoyed the process and was glad she was able to use it again when creating a non-objective piece for our “Artists Don’t Represent” unit.

Artists Observe

Standard

This will be the first in a series of several posts about the units and activities my art 1 students are participating in to get a good grasp on the artistic behaviors.  Last year my art 1 students went through an “artistic behaviors bootcamp“.  After going back and looking at what we had done, I felt it was too fast and there wasn’t enough depth to each behavior. We spent a day or two on each behavior, but it was like we just glossed over the behaviors and my students never really understood them.

This year, I am spending a week or more on each behavior.  We are doing activities that focus on the behavior, while building skills in various media and techniques.  I think this will be a better solution.  The students may not be making as many finished artworks at the moment, but that will come when second semester rolls around and the studio is really much more open.

Our first behavior that we focused on was “Artists Observe”.  I found a powerpoint at Ian Sands’ Art of South B page that was perfect for what I wanted students to do.  The week was split into 3 activites.  First students created mindmaps/had class discussions of what they like to observe and what kinds of things artists would look at when observing something. They then moved onto a 3-day sketching activity, where they learned sketching techniques and sketched from life.

Our second activity included learning to shade and a group activity, originating from Melissa Purtee, where students would get into groups of 3-4 and together create a large shaded sphere.  It was very cool to watch the students work together, within the time frame, and figure out how to make values darker and to replicate the sphere I demo’d for them.

Our final activity brought the students in the world of 3-D.  We spent our final day doing the Tantamounter.  Faculty lent items that the students replicated in an artful way.  They had to make decisions, work in small groups, and create a copy of the original item.  They had a 30 minute time limit to complete their piece.

p1080916

After the weekend, students came back on Monday and spent the day reflecting on our unit.  We went into the hallway and discussed the spheres they had created, looking critically at the spheres and trying to take non-objective judgement out.  They added tiles to their BlendSpace lessons, reflecting on what artists observe means and how the activities we did correlate to the unit idea.  They also reflected on what they learned from our unit activities.

The rest of the week will be spent on building some color drawing skills before we move on to another artistic behavior unit.

2 Weeks of Exhausting Fun

Standard

September is finally here, and for me, it marks having the first 2 weeks of school in the books.  It’s been exhausting and I have had to stop my personal exercise regime because of it. BUT, it has been so worth it.  My new (and returning) students and I have had a blast and have rocked it.

Screen Shot 2016-09-03 at 10.52.36 AM

I don’t like to start off the school year in a traditional way.  I like to have my students jump right in and get busy getting messy.  On our first day, we had 20 minute classes, and I was required by my admin to go over certain things during certain periods.  But, that did leave me time to show a small video to hopefully get my kids thinking about my class and art making in a different fashion.

Over the summer, or maybe it was last year, I found this video by artist and motivational speaker, Erik Wahl.  I thought it was perfect for some first day inspiration.


The next two weeks were spent doing not one, but two community projects.  First my students prepped, and installed our own Unity Project.  The welding students cut down steal tubing to use as our braces.  My students painted 7′-6″ PVC poles black, and they balled up miles of yarn.  Once the set-up was complete, they began to add their voices, by choosing the identifiers that represented them, then bringing it to life with yarn on the installation.  (I will write more about the Unity Project in another post once it is complete.)
 

Once we were finished with our part in the Unity Project, it was time to play with some clay. I like to start the year working with clay.  The majority of kids like clay, and it gives them some time to get to know me and each other without much pressure.  I use this time to teach some basic clay skills–slab draping, scoring/slipping and other surface treatment techniques, and to have the kids give back to their community.  This is the one piece the students will make this year that they aren’t allowed to keep.  I do ask all my students to create a bowl for out Duck Art Club’s charity fundraiser–Empty Bowls.

Next week, we will finish up our bowls, then move onto exploring the artistic behaviors that are essential to my classes.  I hope my students keep enjoying art class and continue to knock it out of the part when it comes to my expectations as the weeks, semester, and year continues.

Journey of an Artwork

Standard

I want to share a story.  The tale of the journey an artwork.  Today a student’s piece finally found where it was going. She started with a proposal to make some kind of moving box…I don’t even know. I didn’t quite understand it.  But, she jumped in and started working, trying to figure out how to make it move.  She cut thin cardboard into enough squares and rectangles to make a box. She found some string and 2 buttons to help pull the walls down.

image

When she got frustrated because she couldn’t make it do what she wanted, she took the box and began to spray paint. Every day she did a different side, experimenting with the spray paint.  Trying different color combos and using different tools.  Learning all this on her own.  She then decided she would instead turn her box into a lampshade.

image

image

image

After completing the forth side, she came back into the room, her face all lit up with the spark of a new idea.  “I have a new idea Mrs. Barnett” she said. She began taking tape off her lampshade.  A little while later she came to me with 5 smaller pieces; each from a different part of her box. She found a silver piece of matboard in the cardboard bin.  She said, this is what I want it to be.  She was so happy.  I could tell she was much more in love with this piece. So was I.

image

I write about this because I think that TAB has allowed this type of focus of the journey and the process.  If I had decided on the lesson and artwork ahead of time, my student would not have had the chance to stray, to experiment with different ways to work with spray paint, to problem solve, to experience the artistic process first hand. She was able to see that ideas change over time.  And to see that it is okay.

A New Exploration Activity

Standard
A New Exploration Activity

I know it has been over a month and a half since I last wrote, but it’s kind of been the same old, same old in my classroom.  But, as the new year and the new semester began, I have many new ideas and things I am trying out with my students.  And, I am going to start with a new to me way of exploring.  I did an activity similar to what fellow TAB teacher Cynthia Gaub does called Around the Room.  I changed it to Exploration around the room: collage and mixed media.

Art 1 jumped right back in when returning from our winter break.  They had new media and techniques to explore and I wanted them to have a new way to explore them.

So, I lined the counters with some large sheets of paper and place a ton of items out for them to explore with: plexi, excess pieces of laminate, and plastic bags for monoprints, cardboard and styrofoam for printmaking, bubble wrap, flowers, feathers, spools, and a plethora of other items for stamping.

I gave a brief introduction outlining part 1 of our exploration activity and then let them go on their way to create some new textures and backgrounds.  At first some were hesitant, but by day 2, they were comfortable and trying new ways of printing with the different methods and objects.


Once we were done exploring stamping and printmaking, we learned about collage and mixed media.  Students were then challenged to take what they had made during their exploration and to use them in someway…either as the ground for a new artwork to be placed on top or as paper to be cut up and used in a collage.

Once the students finished with their exploration artwork, the students reflected on what they learned through a technique exploration blog post.

​Here are some of the fabulous practice works the students created.

This slideshow requires JavaScript.

I have a few tweaks to make, but I like this way of exploration.  I want to combine it with the other methods I use.  Not sure how I am going to do that yet, but it will come to me.


Say Yes to Drawing Tests in Art!

Standard

A concern that I have heard about having a choice-based or TAB art studio is that students don’t ever work on skills–including observational drawing skills.  I would like to address this particular concern.  My students work on observational skills…every 2 weeks.  How do they do this you might ask?  Well, let me tell you…with a drawing test.

Several years ago I went the TAEA (TX Art Ed Assoc) State conference somewhere and I attended a session on creating workbooks.  In that session, the two teachers mentioned drawing tests. I was intrigued so I asked for more information.  They gave me the run down and I have been implementing them in my classes ever since.

I thought the drawing test was such a great way to have the students spend a few moments of uninterrupted time to concentrate on observational drawing.  And, now that I am in a TAB room, I find this time even more beneficial.

Here is the low-down:

MATERIALS:

  • many class sets of objects.  I went to the dollar store and bought a ton of crap over the year that would be good for drawing–spoons, forks, ramekins, ornaments, salt shakers, etc.  For me a class set is 24.  I also bought a bunch of cheap bins from the dollar store to hold each set.  It is an investment, but worth it.  If you can find sets of things…like the forks came in groups of 3, ornaments come in packs of 12. Each box is labeled so it is easy to find and pull out.
  • squares of lightweight drawing paper. I have a ton of 60# white drawing paper.  I cut the paper down to 5.5-inch squares.  I cut a bunch at a time…enough to get me through a few weeks of testing for 4 classes.  I keep it all in a bin.
  • white poster board or railroad board. This is used to mount the tests for the book at the end
  • silver rings. I use the binding rings.  This holds the books together and makes it easy for the students to flip through.
  • white labels. to be used to label the pages of the book
  • double-sided tape. to attach drawing tests to the railroad board
  • timer. the tests are timed

HOW TO:

  • Each student gets a piece of paper and the week’s object.
  • We start off with easy things like Legos and work towards more complicated things.
  • Each test is timed. Art 1 starts with 5 minutes and works up to about 10 minutes at the end of the year. Art 2 starts at about 7 minutes and work up until 13 minutes.
  • Every week I tell the students things I want them to concentrate on when they are drawing.  I usually start with 3 things and as we move along, the easier things get removed and harder things to observe and concentrate on get put in.
    • shape
    • line quality
    • use of 3-d
    • surface quality
    • no lines
    • shading/shadow
  • There is no talking during the test
  • They must draw the entire time.  This means they either need to draw again or try to improve what they have done.
  • I also don’t let them listen to music.
  • I type up a sheet and post it on the screen during the test.  The sheet has the date, the drawing time, and what I am looking for.  Also, the reminders about drawing the whole time and talking are at the bottom.  I save all these because they give me the information for the labels later on.

Before we start, I give reminders and tips to drawing from life and observing things like shadows and planes.  I talk about making connections to help with proportion.  I point out things they should notice…like the salt shaker top is not as wide as the glass part.  During the test, in a quiet voice, I give reminders about how to observe and things to notice.

When time is up, I have the kids sign their work.  The first test they write their names on the back for my reference. The second time we talk about signatures and how artists sign their work.–I show some famous examples like Picasso, Monet, Durer, and myself.  After this, they then can write their name on the back and/or sign the front.

From there I take up the tests, grade them, and put them away for safe keeping.  Sometimes the kids ask about them, but mostly they kind of forget about the tests themselves.  I don’t hide them and if they want to see them, I let them see them. What do I do with them?  This is where a good aide comes in.  Each test gets mounted on a 6X9 piece of railroad board.  Each board gets a label with the date, the test time, and what was the concentration areas.  At the end of the year, each board gets hole-punched twice and put on rings.  I make a cover page for each book and hand them back the last day of classes (well most of them anyway.)

The students like to look through and see how far they came.  They remember which items were hard, why things were hard, which they hated, which were easy, and which they didn’t try on.  Many cherish the book for years to come.  Several years ago, Ethen left his book behind.  I kept it because it was good, Ethen was one of my favorites (don’t tell nobody), and I could use it to remember what objects I used when, etc.  This year Ethen was a senior and he saw I still had the book.  He wanted it back because he didn’t have any of his drawings.  I was sad, but silently happy that his face lit up when he looked through it and remembered our awesome class.

Anyway, this past year I stumbled upon an article that talked about some of the things my students question me about–the main one is the silence/no music thing.  Here is an excerpt from the article.

1. What if I told you, you talk too much?

Talking and drawing don’t mix.
The main problems associated with drawing is when you talk you engage your logical, language dominated left side of the brain. This side of your brain is keen on knowing an objects name, labelling it, and organising it.
Often when learning to draw, you need to temporarily hold off judgment and try not to second guess what you think the object should look like, rather than what the object actually looks like.
When you are trying to learn to draw something realistically, you have to engage your right hand side of the brain, which is keener on images and spatial perception.
It’s very hard to do both at the same time.

Why?

Because it causes mind freeze.
Have you ever been in a creative zone of absorption, a state where time travels quickly and you are in what psychology professor Mihaly Csikszentmihalyi calls ‘flow’.

How Does It Feel to Be in Flow?

  1. Completely involved in what we are doing – focused, concentrated.
  2. A sense of ecstasy – of being outside everyday reality.
  3. Great inner clarity – knowing what needs to be done, and how well we are doing.
  4. Knowing that the activity is doable – that skills are adequate to the task.
  5. A sense of serenity – no worries about oneself, and a feeling of growing beyond the boundaries of the ego.
  6. Timelessness – thoroughly focused on the present, our sin to pass by in minutes.
  7. Intrinsic motivation – whatever produces flow becomes its own reward.

Flow is the mental state when you are fully immersed in an activity, a feeling of full involvement and energy.
You can get to this stage of involvement whilst drawing… until you get interrupted.
The combination of left and right battling against each other makes trying to draw tricky.
You can learn to talk and draw at the same time but it takes practice.
It all starts by understanding how your mind works, and how you can be subconsciously sabotaging your best efforts.

This excerpt is from an article by Will Kemp called “The 3 reasons why you can’t draw, (and what to do about it)”.  You can find the remainder of the article here.

I posted the excerpt on the students’ art blog.  Next year I plan on having them read the article as part of class, instead of just stumbling upon it.

Like I said, I think having these “tests” are important.  I think most kids think they can’t draw and this helps to show them otherwise.  Furthermore, it is good to have a time set aside for the students to work on these exercises.  Using the word “test” is mean, but I think it somehow gives the exercise a sense of importance in their minds.

Here are some examples from this past year.  It is a mix of art 1, art 2, and life skill students.

This slideshow requires JavaScript.

Year in Review: Part 2: Things Learned and Things to Learn

Standard

In this part of my reflection on the 2014-15 school year, I decided that I would look back over the changes that took place by bringing TAB/CBE into my classroom.  While I have offered modified choice in my room for a while, this was the first year to fully implement the TAB pedagogy. It has been a huge learning experience, both for my students and for me.

I had heard and read about all the wonderful things that have an open studio could do, but to be honest, I was still skeptical.  Could my student population really do well with such freedom?  The answer is yes.

Let’s start with some positives from this year:

  • P1050661Kids worked through artwork until they were satisfied…at times starting a new piece because it just wasn’t working.  This just amazed me.  I’ve had kids work hard on things before, but never with the fervor I’ve seen this year.  They pushed themselves. And it paid off.
  • Kids learned from other kids on how to do something I didn’t teach them.  They would see something someone else had discovered and asked how to do it.
  • Kids tried new things, even when previously saying they didn’t like such-n-such medium. Some would try out a material, such as clay, just to discover they still didn’t like it.  Others would finally break away from what was known to the, only to find a new love.
  • Clean-up/ownership of materials and tools.  I have to clean a lot less than in previous years.  I am not seeing a mis-use of materials (paper, paint, etc.–except for ez-cut.) Trusting my kids to be responsible with tools and materials was probably my biggest hang-up when moving to full choice. But, I was pleasantly surprised when tools got returned, when I still had erasers at the end of the year, and when the majority of brushes were cleaned.  I think that giving the students trust to maintain the studio was a big factor in this area.
  • I am noticing I use the word kids a lot.  My students are in high school and probably wouldn’t want to be called kids, and they aren’t related to me, but they feel like my kids.  This year I have had the most comfortable relationships with students.  I know more (and some things I would like to forget..can you say tmi?) about my students this year than I ever have before.  I think thP1060155is stems from a combination of reading their blog posts and the type of conversations I was able to have with my students.  Because I wasn’t focused on them creating a certain thing or following a specific rubric, I was able to go deeper with them into their work and their lives.
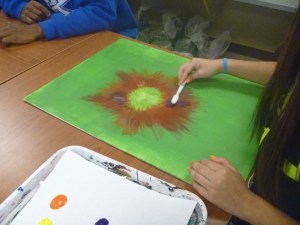
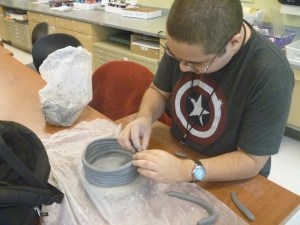
  • Lots of growth happened this year.  Not every student grew.  Some kids are just there for the credit.  They don’t care one way or another, and no matter what you say/do or don’t say/do isn’t going to change that.  There were classes I took in both HS and at my first college where I felt the same.  It’s normal.  It’s okay.  And I accept that.  But, for the majority of students, they did care.  I saw them push themselves.  Some grew in drawing skills.  Others in painting.  Some grew in meaning put into their artwork.  I had a couple that finally stopped copying things from the interwebs and began making their own.  One student who did the bare minimum for 90% of the year finally came alive at the end once he realized he could things in an anime style if that is what interested him.  He didn’t pass, but he promised me that the flame I saw at the end would be there for the whole time next year.  I have a hundred stories to tell about student growth.  It makes me smile when I think about them.P1040736
  • The art making didn’t always stop with just creating the theme artwork.  Many students just kept going.  They wanted to create this or that, so I let them.  Why stop the creativity?  Why make them sit there and do nothing?
  • My school is a 1:1 macbook, and this year I felt I really had the students using the computers in a positive way.  We weren’t using it just because it was an expectation.  We were using it to communicate and reflect.  The website/blogs created by the students and by myself were a great thing, even if their writing needs some help.

While I did change things during the year to better meet the needs of the students, I still have areas that need addressing over the summer.  And of course, there are areas I feel that if I just changed it up a bit, students would be more successful.

  • Helping the students to understand why we do the blogs.  We started out with artist behaviors.  The students wrote about what they were doing and addressing the behaviors.  I thought P1040846they were moving along and understanding things.  So, we moved to artist statements after winter break. Nope. Most students weren’t there yet.  I then gave them the option to either do an artist statement or pick 2 behaviors like we did previously.  After reading their end of year surveys, I know they didn’t really see the point of them.  A handful of students did (and by handful I mean like 5), but the majority couldn’t see the point of writing in art and thought it was just busy work or for a grade. This is good to know.  I know my student population has an issue with writing, and I am sure that our state testing is partially to blame.  They are not good at writing, sad to say.  But, what I gleam from all this is that need to help them to see that artists write about what they do.  That reflecting on the actions they are doing can help them grow as an artist.  And, that writing is not just for English and History class.
  • I did well creating demos for the students, but I feel I could do more.  I feel that I left some things up in the air…like color mixing…and some kids never explored that on their own.  Perhaps if I give them a taste of what color mixing could do…it could bring more life to their artwork.
  • The students have the ideas, they just need a bit more help as to what is possible oP1050608ut there–both in image, media, and technique.  How do I get them to see beyond the typical art room materials?  How can I encourage them to try something new?  How can I get them to go deeper and think further beyond the obvious? I need to address my line of questioning, the way images get shown to them for inspiration, and helping them to make more dynamic composition decisions.
  • This is the first year I had all 3 sculpture levels doing ceramics.  It was a lot of trial and error. While the students were happy with how things ran, it could be better.  I haven’t figured this out yet, but I will…even if every year we change some things to make it better.
  • Themes were tricky.  Ones that I thought would be killer…dropped dead.  I like working with the themes and I think, especially for my art 1 kiddos, they worked well.  Feedback said the students liked to have a starting point for their artwork.  Things I have been considering for next year…giving the entire list of themes and having them pick as they please…but then how would our padlet brainstorming work with that method.  Having the students suggest themes and then having a vote.  Something else?P1060109
  • Feedback and critique needs to change…big time.  I give personal feedback as I walk around, but I feel I miss students or I hit them too late in the process and they have yet to fully understand things can still be changed and you can go back to an earlier stage.  I want to do critiques more…especially mid-project. (And definitely mid-project in ceramics.)  I am hoping that this topic will be brought up at the TAB Institute this summer so someone can help me to suss this out.

I have more questions, but this has gone on long enough.  I feel that I will always have questions and that is a good thing.  I can’t become stagnant and complacent in my art studio.  No one will benefit from that. All in all, it was a fabulous year.  I mean, there wasn’t one day this year where I woke up and said I didn’t want to go to work.  That says something…don’t you think?  And I know that things will just get better and better if I keep putting my students first by helping them to think like artists and behave like artists and create like artists.

Big changes are on the horizon at my school.  Our entire admin staff is changing.  We are getting a new principal and moving from 4 assistant principals to an assistant, an associate, and a dean of curriculum. And, they will all be new people.  I’ve had a chance to sit and chat with our new principal.  He is very easy to talk to.  I told him about all the changes that I’ve done this past year.  I talked aboP1050334ut TAB and choice and the pedagogy.  He thought it was wonderful and that it aligned with something that was talked about at some principals/superintendents conference.  That made me happy and feel that I was doing the right thing.  And, surprisingly, when I said my final good-bye to our current principal, he said something I never thought he would.  We didn’t always see eye to eye, and sometimes I thought he just didn’t notice and didn’t understand.  But, he told me to keep doing what I was doing.  To keep my expectations high and keep pushing the students.  He said that that is what they will remember and what they will appreciate.

And to that, I say, they do.  And I will.

Let There Be Light?

Standard

Light:    

  1. the natural agent that stimulates sight and makes things visible.  
  2. understanding of a problem or mystery; enlightenment.
  3. (of a color) pale.
  4. of little weight; easy to lift.
  5. gentle or delicate.
  6. (of entertainment) requiring little mental effort; not profound or serious.
  7. (of persona) good; vs. evil (dark)

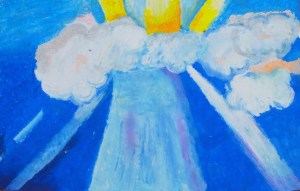
This was our theme.  Seems like there could be a myriad of possibilities.  I thought it would be “easier” that our previous theme of “Sound“.  Unfortunately, it was much harder than I thought it would be for my students.

I don’t know if it was the theme or if it is just that time of year.  (To be honest, I have hit that proverbial wall that often shows it face in February as we are just on the cusp of beginning the last 2 marking periods of the school year.  But, I digress.)  While a few knocked it out of the park and had some deep thinking and meaning to their artwork, many just went through the motions.

Not everything that came out of this unit was bad.  It helped me to realize some things about my students, myself, and the atmosphere in the room.  My students need a break from computers.  Enter our next theme of surrealism where they will rely on their minds for ideas.  I need a break.  I know we just returned to school, but I feel like I am about to start up this huge mountain of responsibilities and I won’t get to the top until mid-April.  And, finally, my room has become too comfortable.  It’s a double-edged sword really. It’s what I wanted.  I wanted my students to want to be here.  I wanted my students to want to make art.  I wanted my room to be a living thing.  And it is all of these and it is not all these things.  I don’t know how to explain it.  I like the chaos of art making and several of my classes deliver.  But what I don’t like is just general chaos–which other classes are becoming.

So, see, this unit has brought reflection and thought for me.  This is a good thing.

Here are a few more good things that were brought about by this unit.

P1050806 P1050811 P1050814 P1050837 P1050839 P1050844 P1050874 P1050879 P1050882 P1050913 P1050914 P1050923 P1050925 P1050927 P1050974 P1050978