Tag Archives: tab studio

Classroom Protocols in the Time of Covid

Standard

I know it’s been a while since I last wrote. It’s been, well, it’s been a semester–interesting, frustrating, at times apathetic, and at other times guilt-ridden. I am sure most of you know what I’m talking about. I thought I would start off the new year with trying to look at the positives, with hopes that I can help some people. We spend 2/3 of the first semester doing both in-person and asynchronous. Like other in-person art teachers, I had to figure out material procedures that worked within restrictions handed down from on high–no group work, no sharing, single-use if possible.

I run my TAB studio in a very self-serve type of environment. Unfortunately this year, that wasn’t feasible and I didn’t set up the studio as normal. ::sad face:: Fitting the expectations set out for me to work into an open studio was frustrating, but over the 3+ months I’ve had students in my room, I’ve been able to come up with strategies to make it work. I do have less than half the students I would have normally in my room, and my largest class was 12 (half my normal cap BUT it was a ceramics class, so that made things interesting.) Fewer students does make some things easier, I will admit, however, I did need to order a bunch of supplies that I wouldn’t normally order–more new brushes, lots of extra tools, extra sets of some media, single-use condiment containers, mesh bags. But in the grand scheme of things, it will help out in the future as there are some things I think I will continue using and doing after we return to a more “normal” school life.

Let’s do this…

Time Out area:

  • I got this idea from another Texas TAB teacher, Lori Wallace. Not sure if it was her idea or not, but it’s a super awesome idea.
  • It’s an area on my counter that I marked out as the time out area with some tape. (A student thought we needed a fun zone too, so there is that section next to it labeled as such.)
  • Students put all used tools and materials there, so at the end of the day I can sanitize spray them.

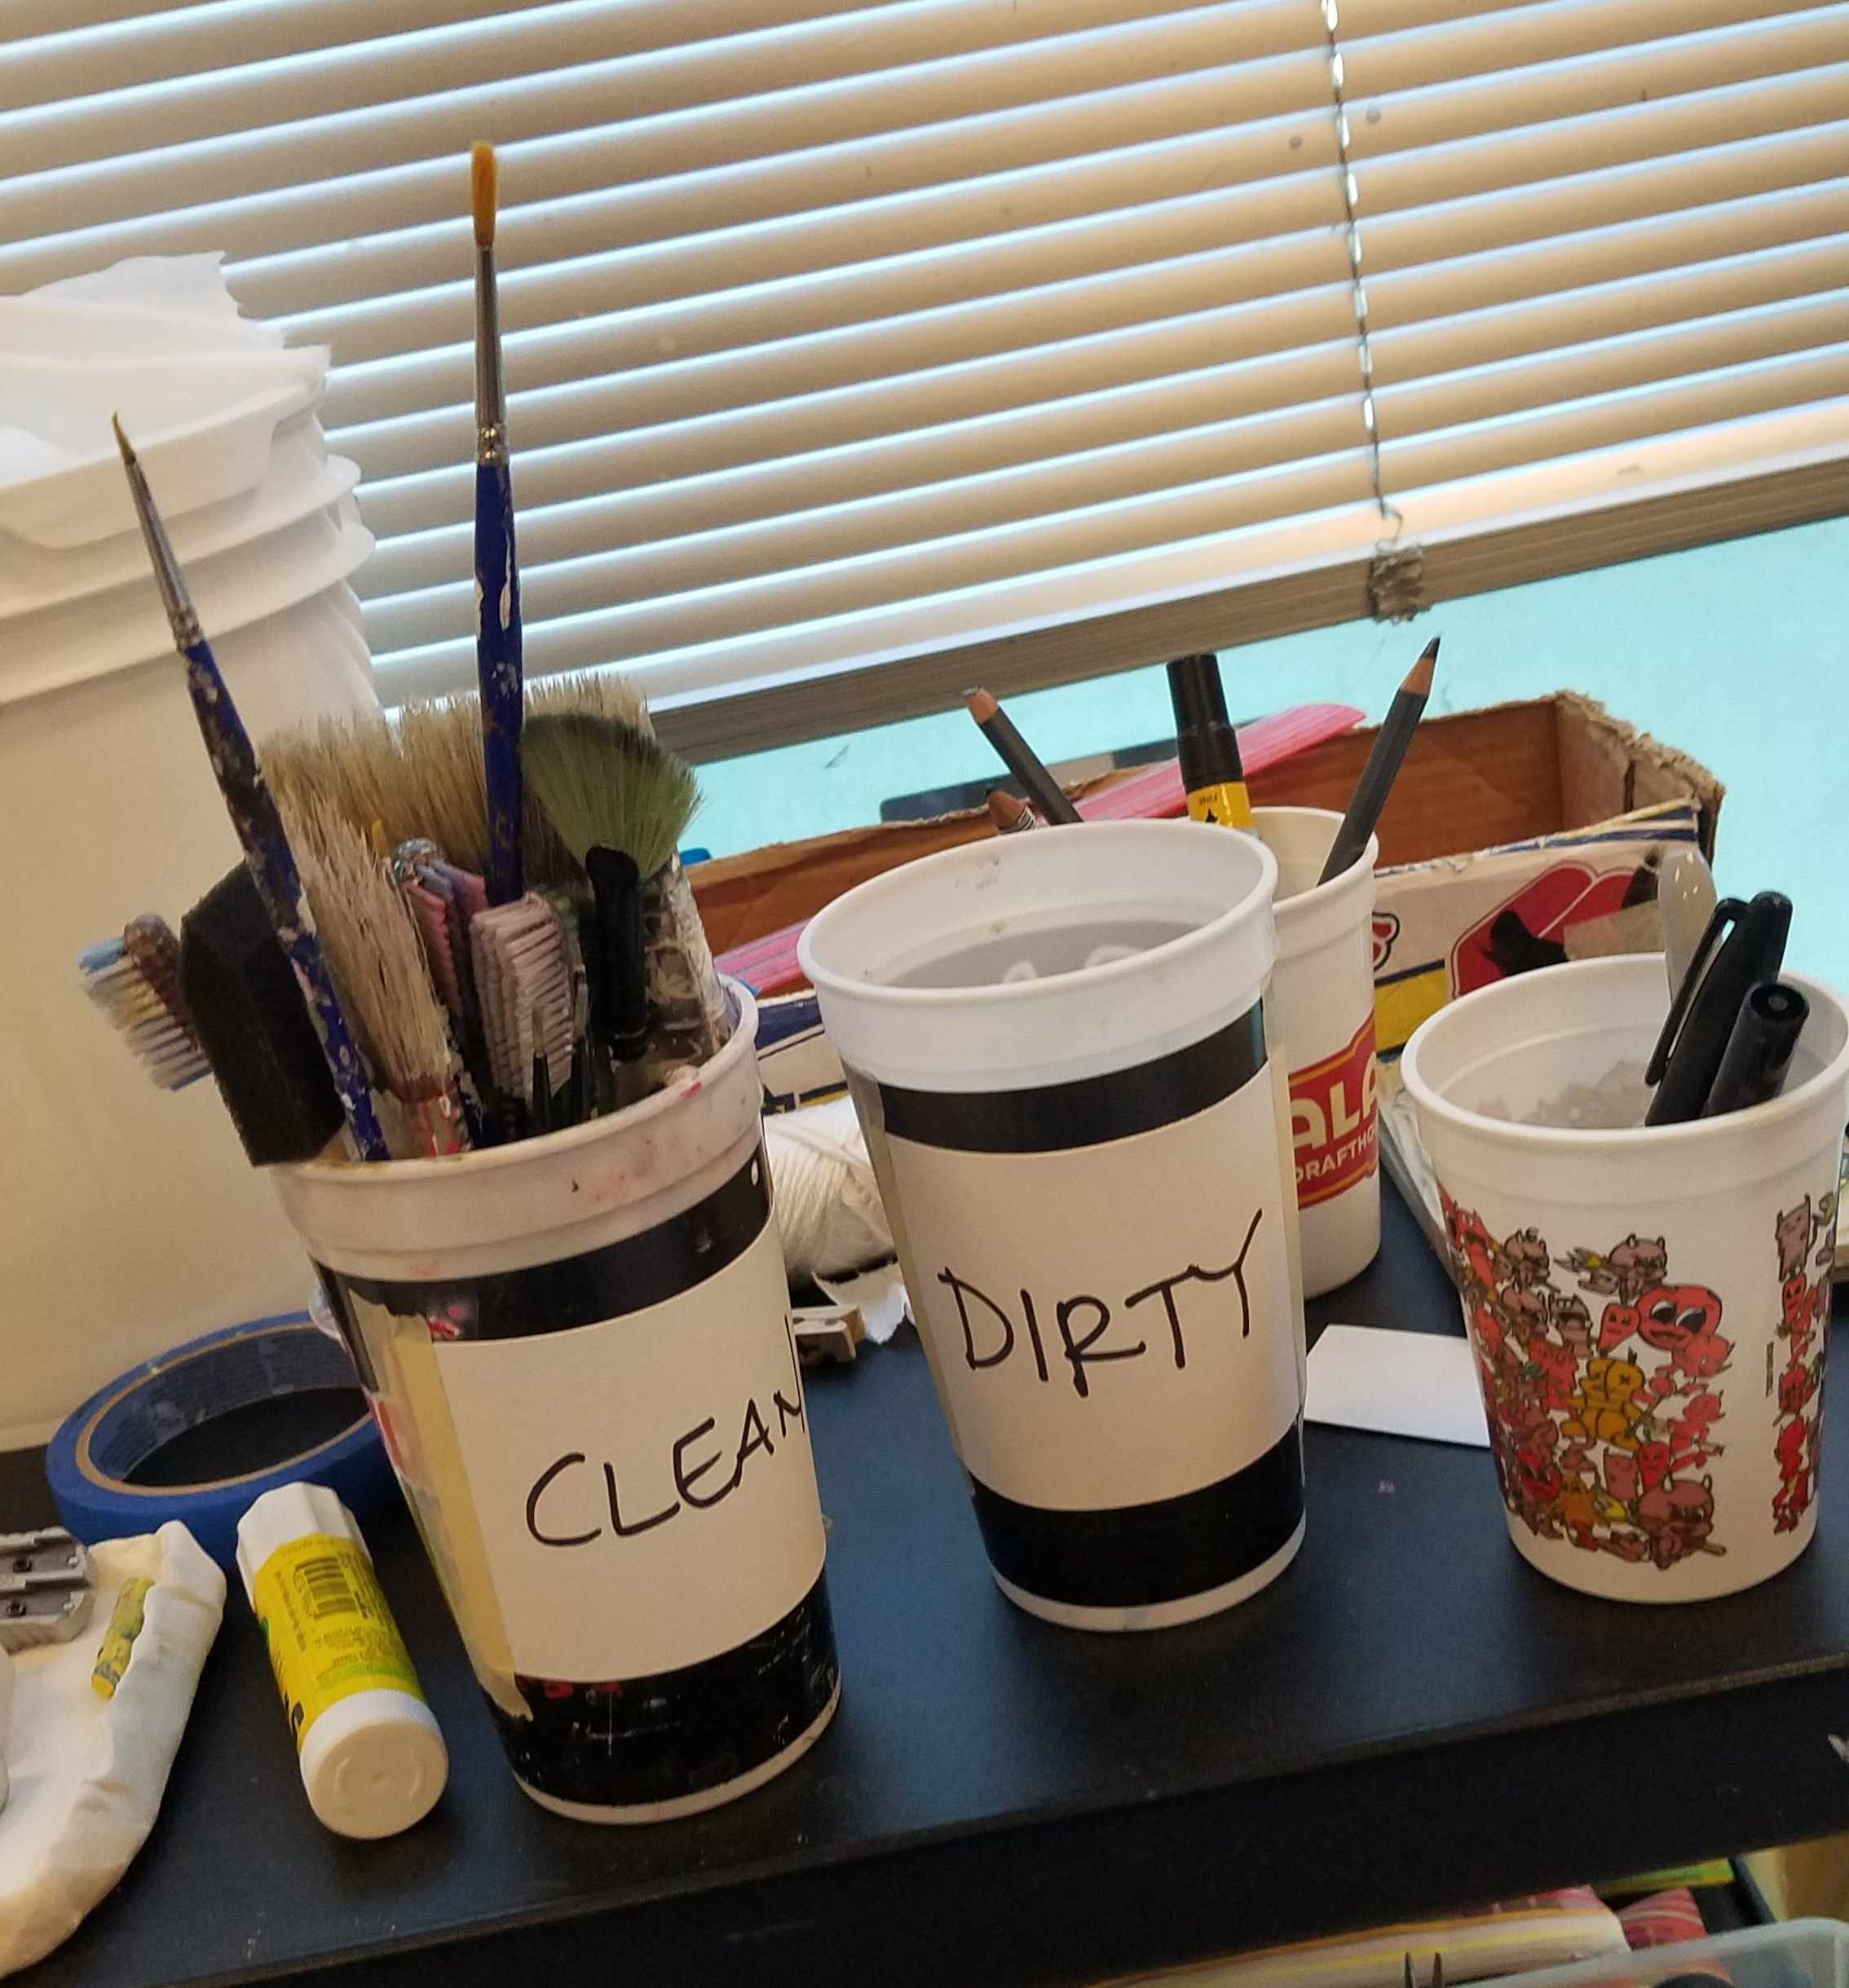
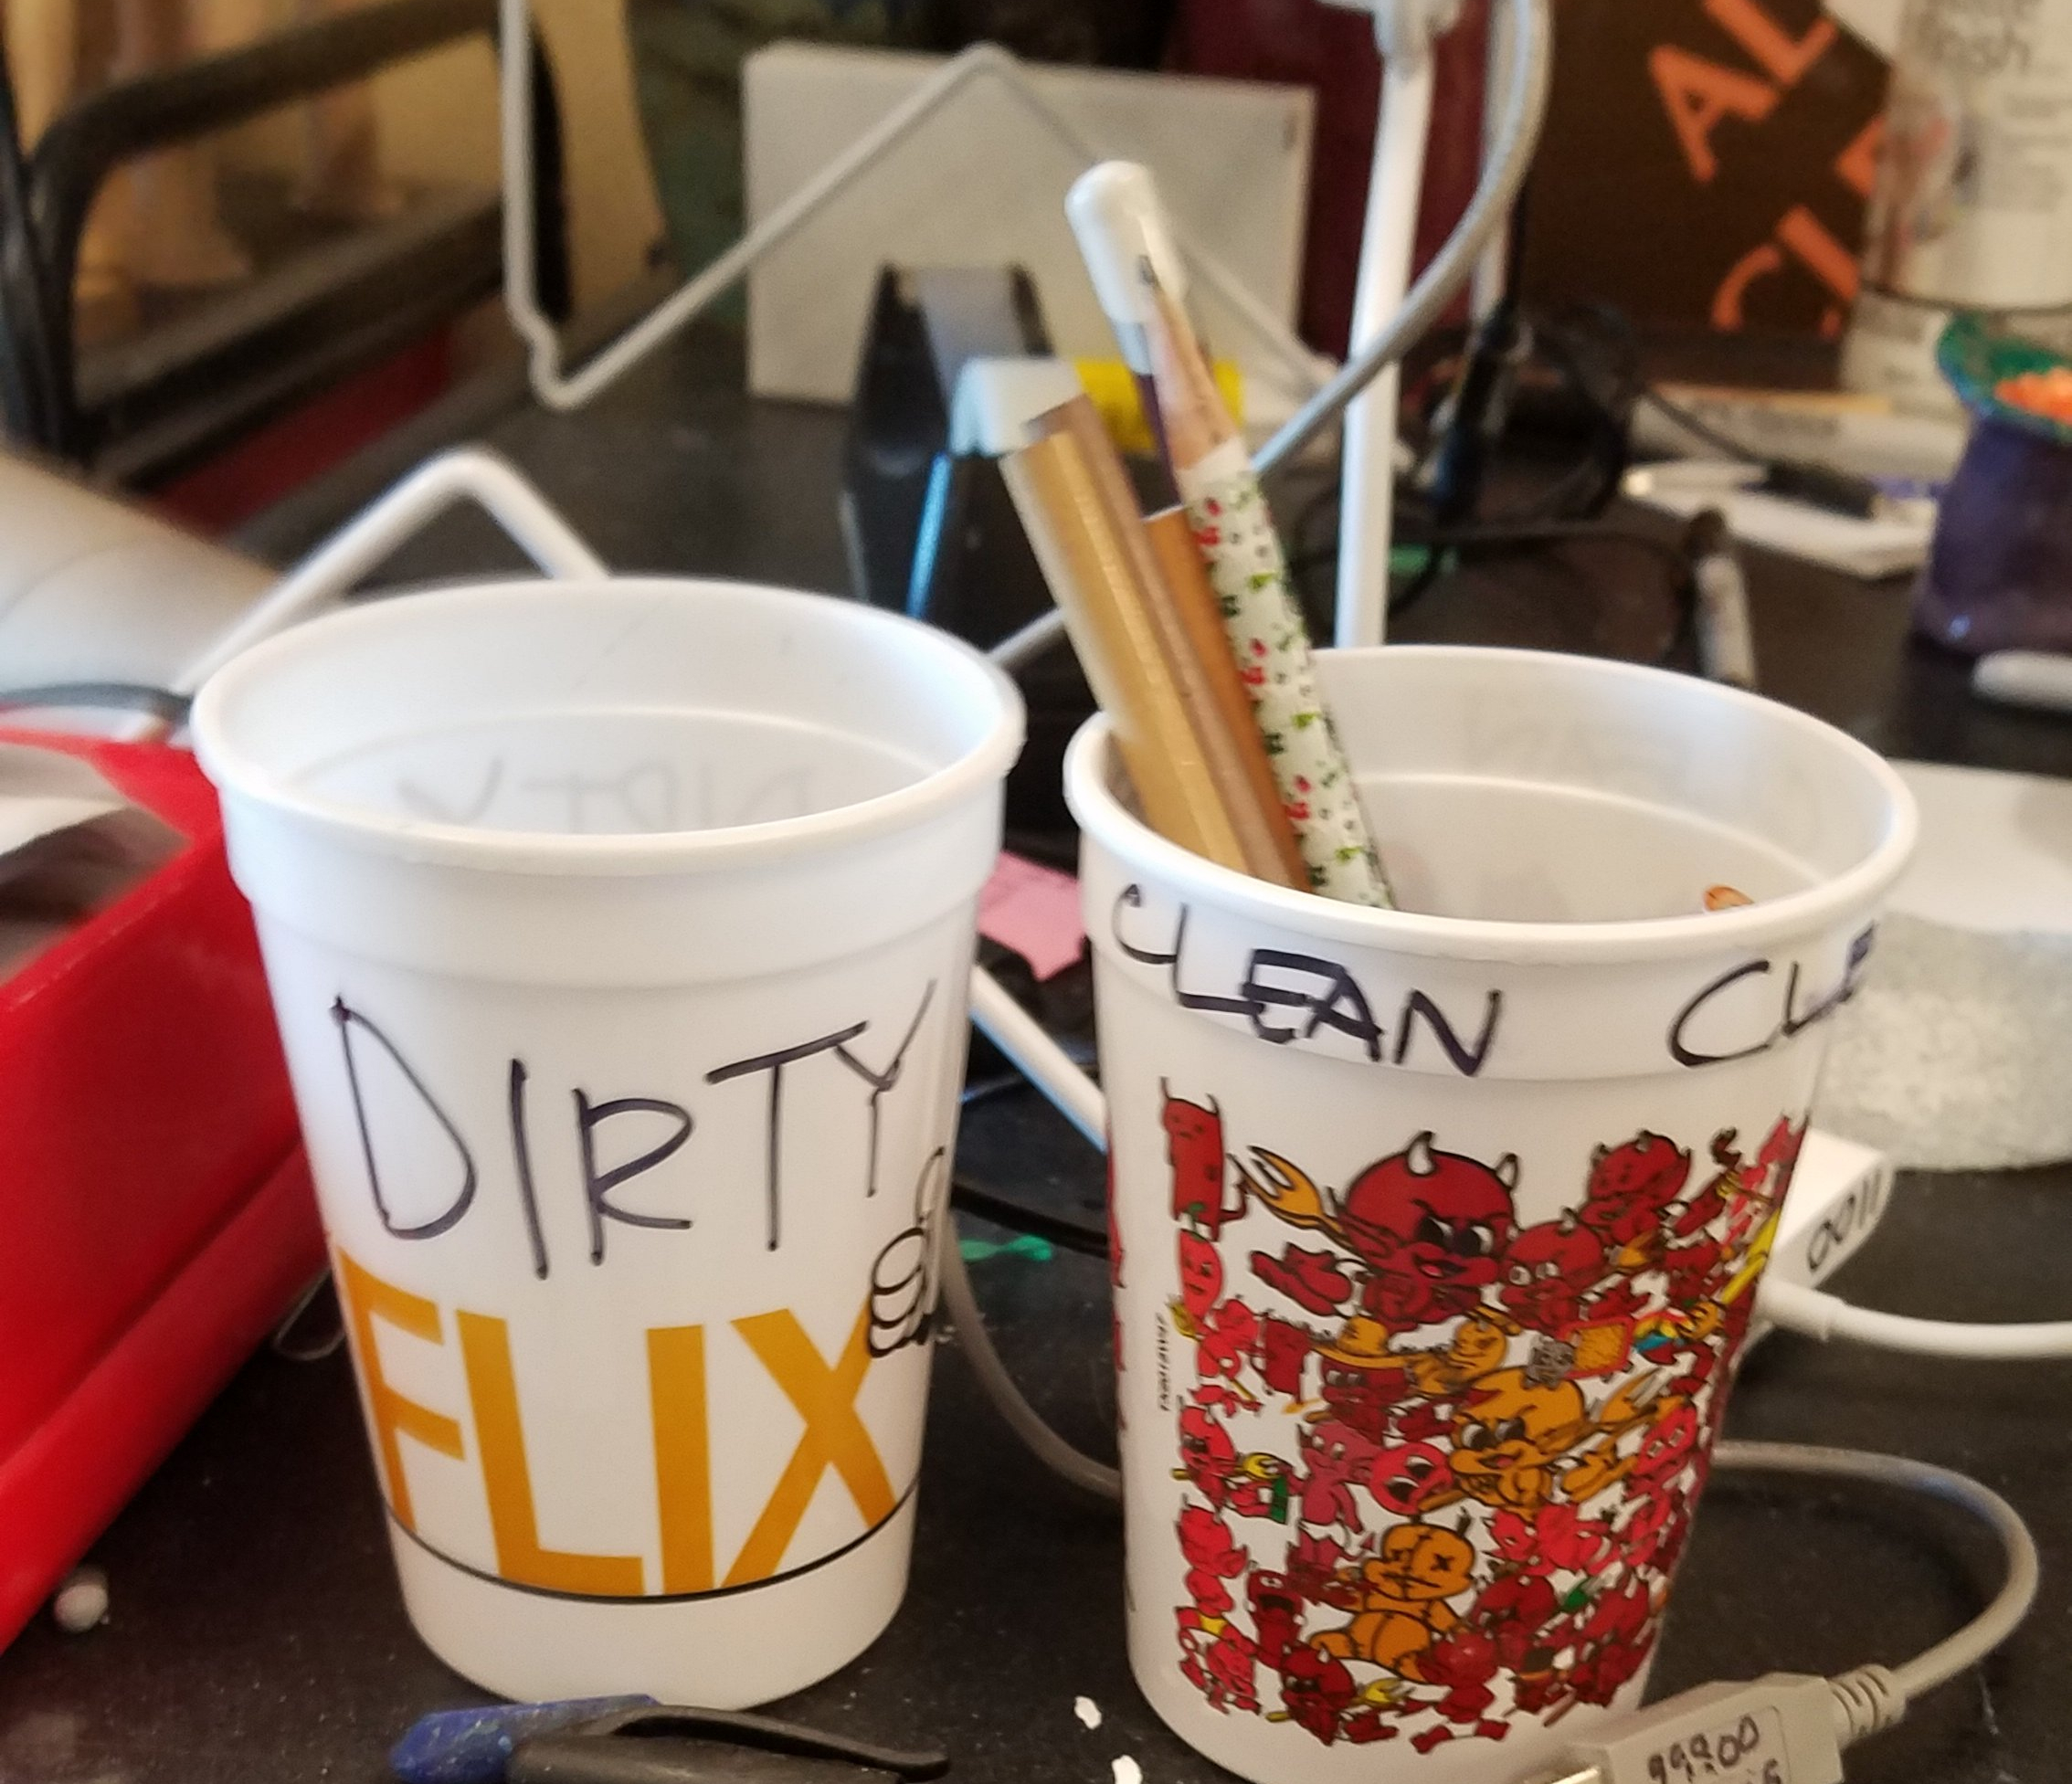
Clean Cups and Dirty Cups:

  • In a few different places, I have 2 sets of plastic cups–some labeled clean, and some labeled dirty.
  • Cleaned tools (pencils, sharpies, skinny paint brushes, etc) are in “clean” cups.
  • After student use, they put the tool in a dirty cup (this includes hand sharpener and erasers).
  • I wipe down the hand tools with the provided sanitizing wipes at the end of the day, and then put them back into the clean cup.
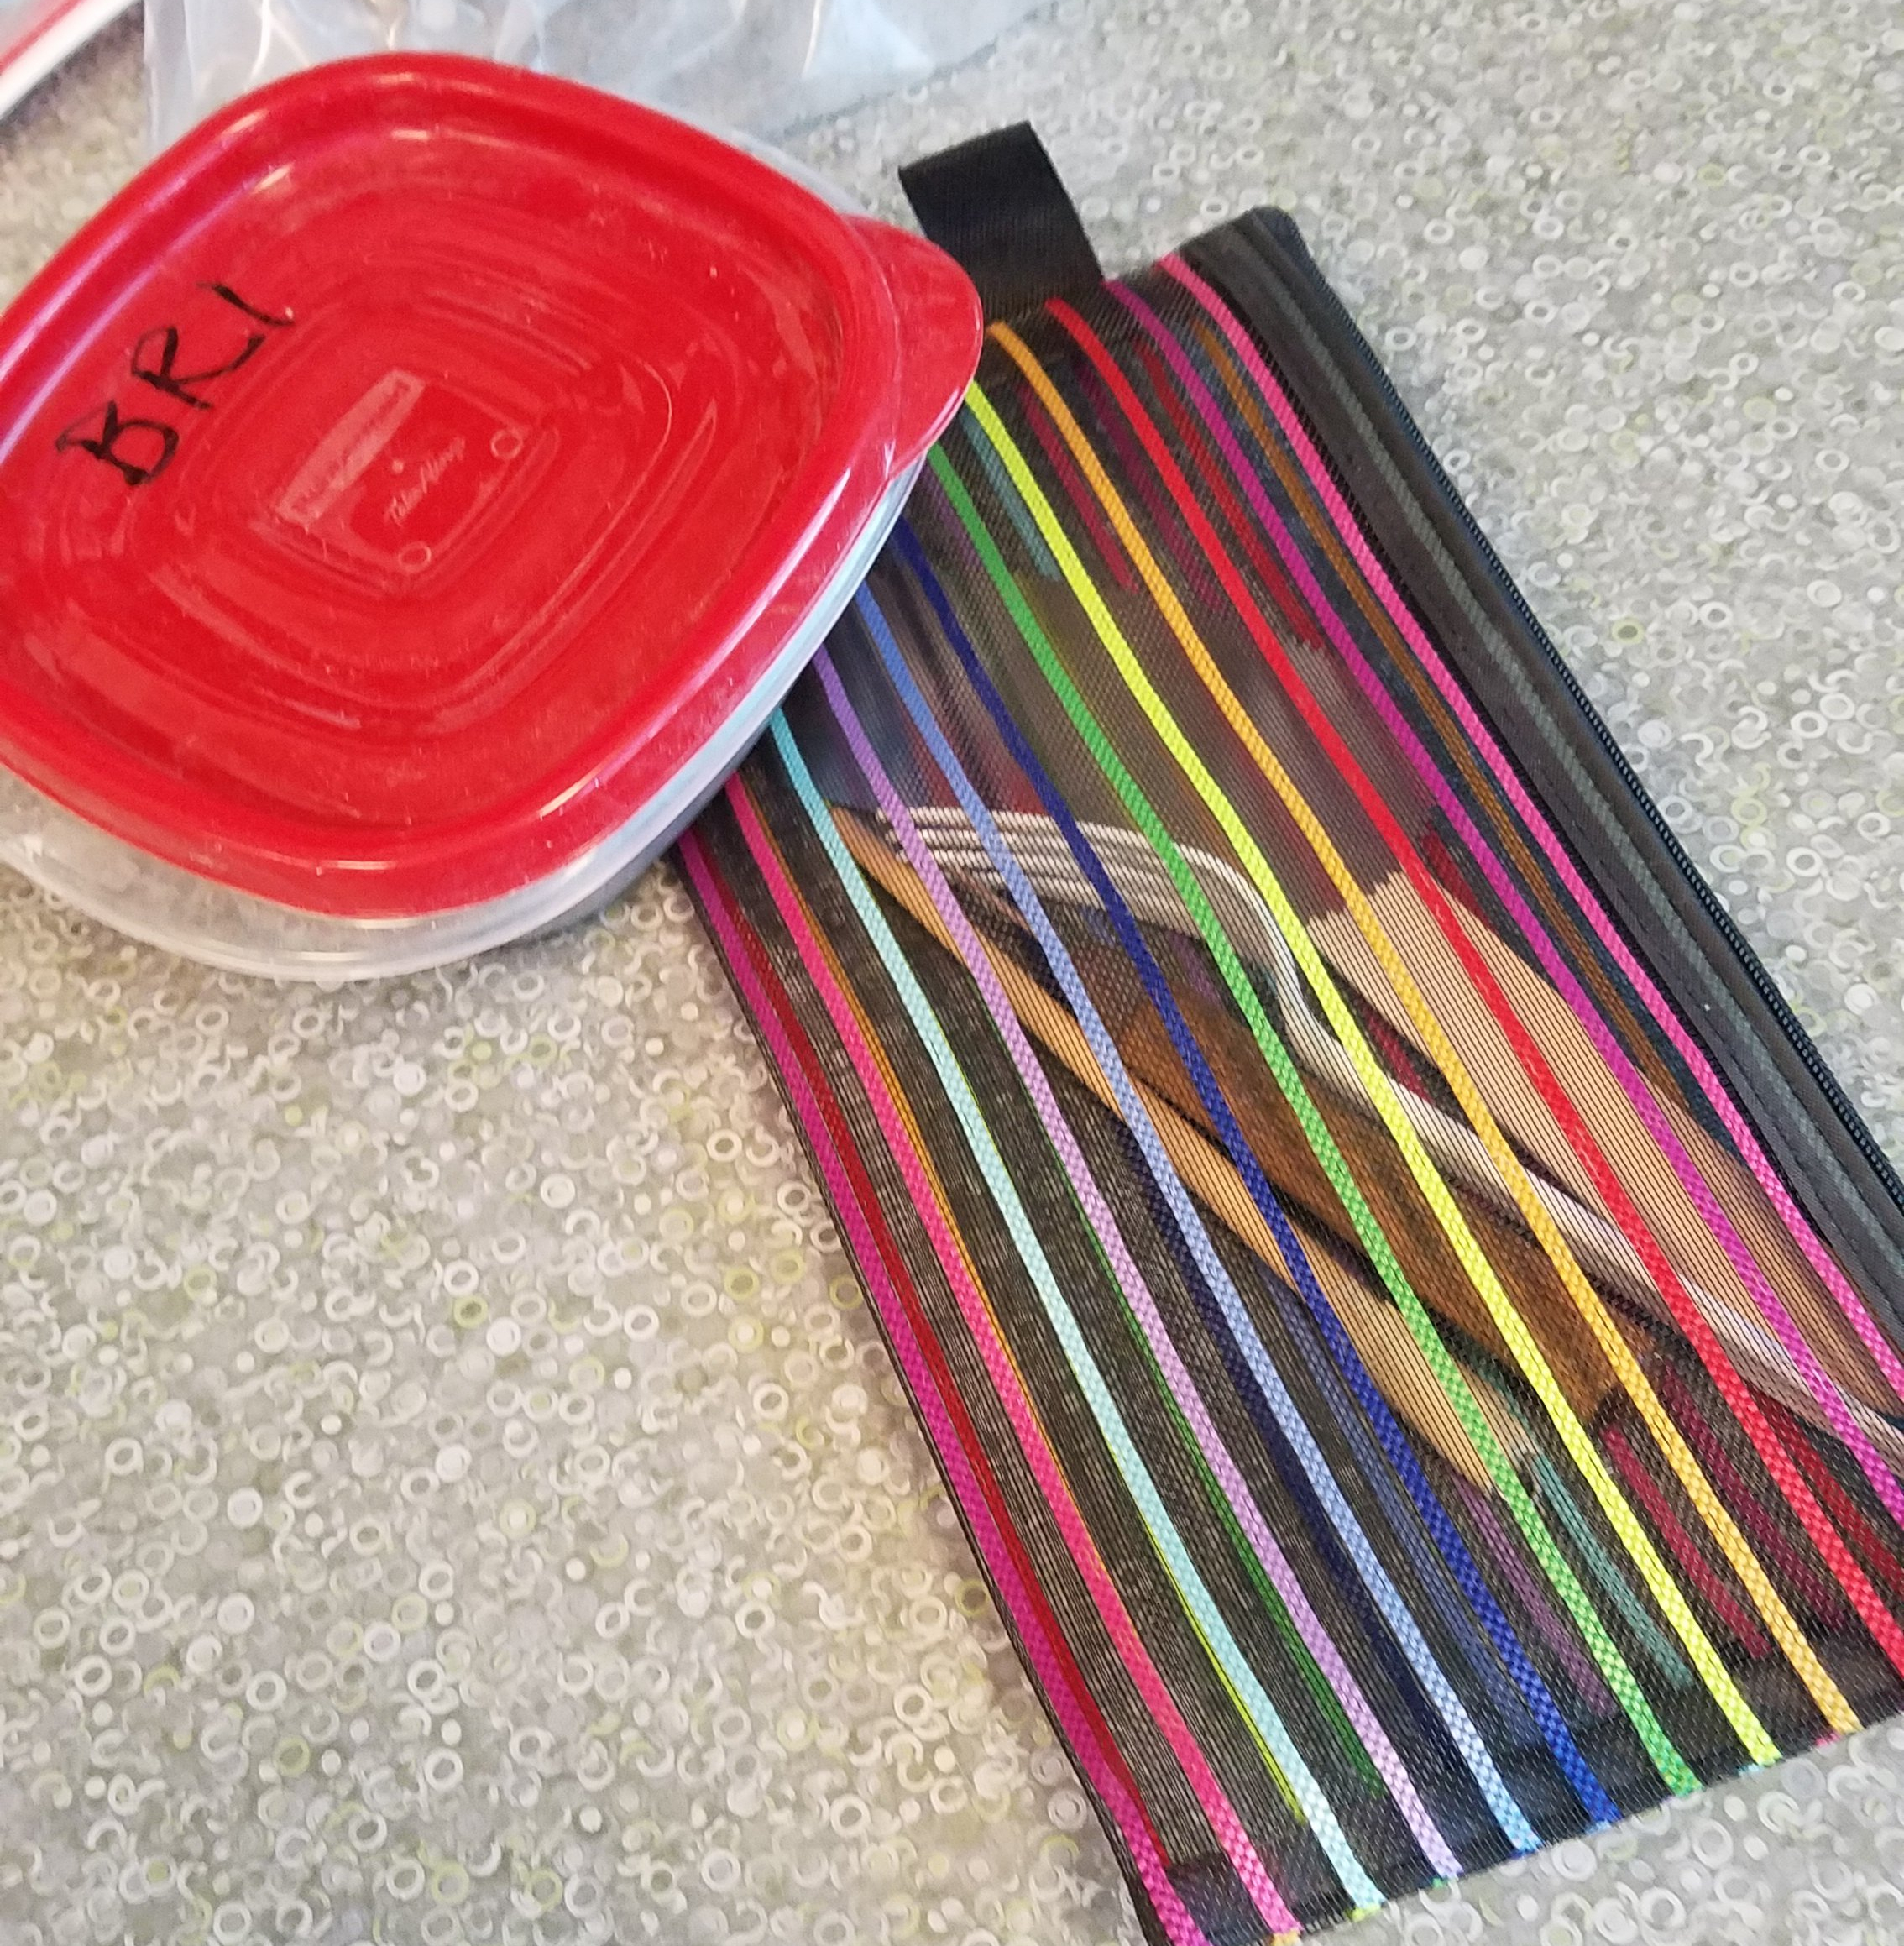
Mesh Bags:

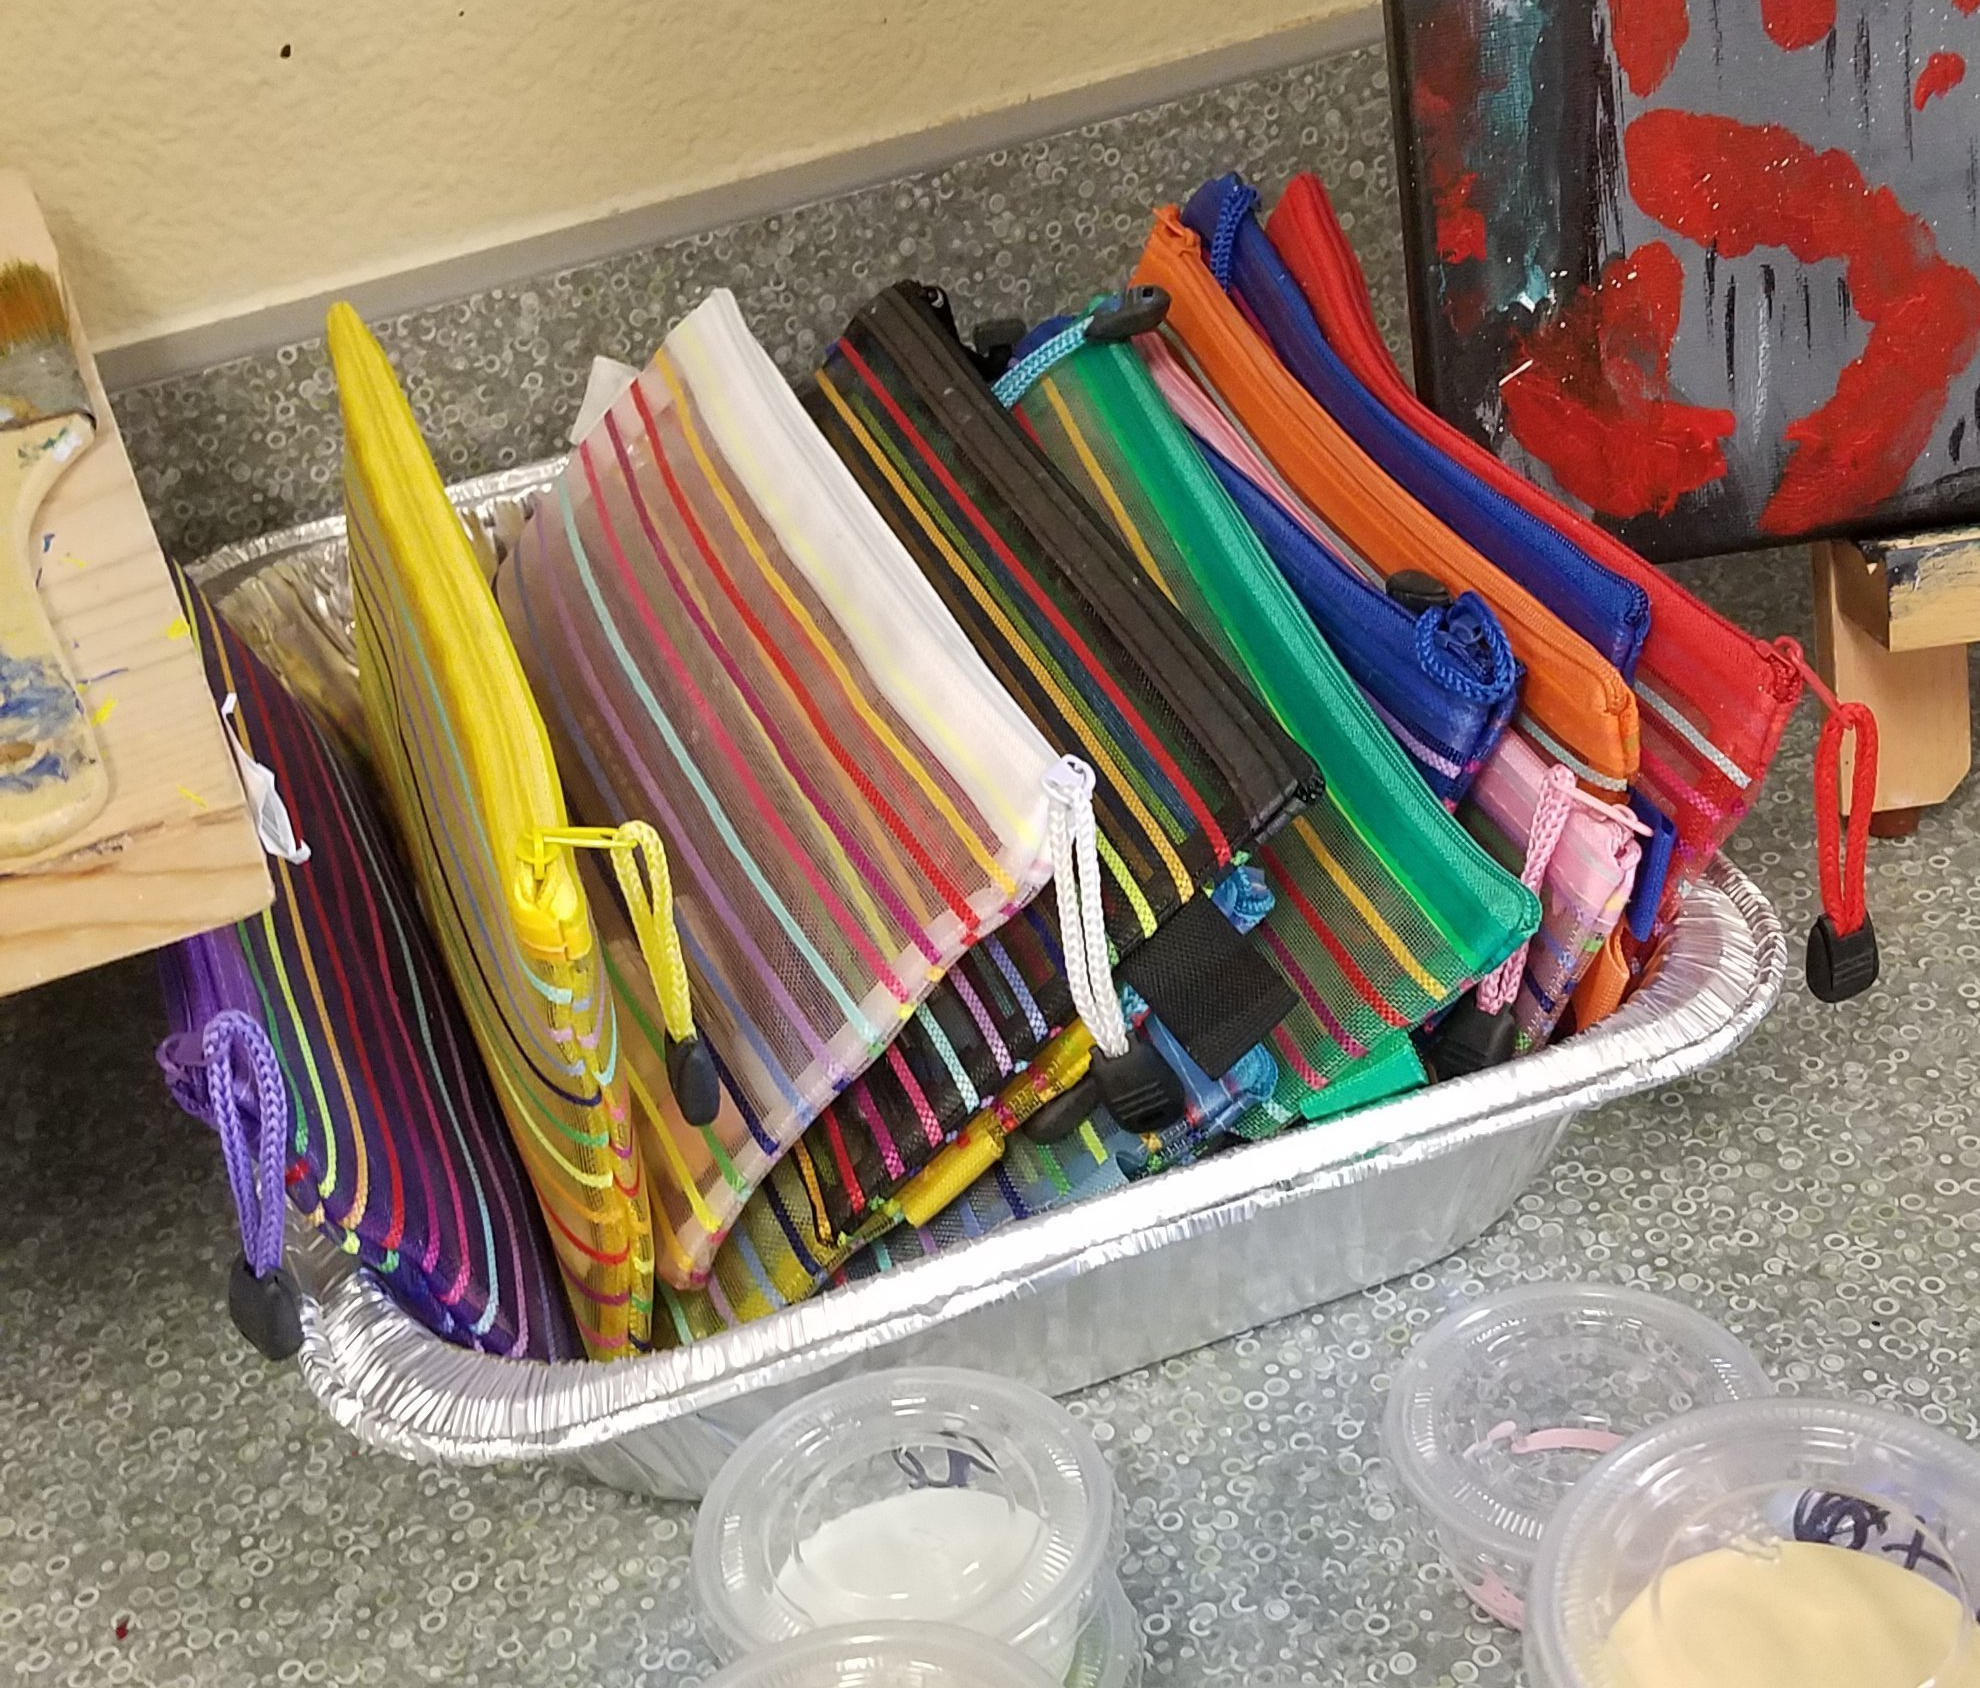
  • I bought these mesh bags with a local grant, about 80 or so of them. I use them for many things: sets of acrylic brushes, sets of watercolor brushes, ceramic students individual tools, sets of brush markers.
  • What makes them nice is that after the students use whatever is in them, they can put the bag in the time out area, and I can just spray the bag, turn it over, and spray the other side. The bag is mesh and plastic, so it gets the inside contents and allows for drying.
  • This will be something that continues next year…using the bags for sets of things.

Materials List/Paint Color List:

  • I made a list of all the different media I had to offer and a swatch of all the acrylic paint colors I have. I then laminated them and taped them down–one on each desk
  • Students can tell me what medium they would like and I can get it for them.
  • Students can tell me what paint colors they need, and I get those too.
  • This lessens the amount of hands touching things–I wear gloves to get the different media.
  • I don’t have to worry about sanitizing the paint bottles after each use because I am the only one touching the bottles.
  • I put a piece of copy paper on each paint tray (cafeteria type trays), squirt on the selected colors, and give the students their paint. They throw out the paper and put the tray in the time out area.

Individual Student Tool Sets:

  • This is mostly for my ceramic classes. This was costly, but there wasn’t really any other way. Tool kits were made; some sent home (and they come back when kids come back), and some stayed for in-person.
  • Each student has their own cubby where they keep their tool bag. I repurposed my cubby since I didn’t set up the studio as normal.
  • Each kit has a needle tool, a serrated metal scraper, a wide paint brush, a home-made sgrafitto tool (that each student made themselves), and a piece of canvas. I also bought a ton of wooden dowels (which I cut down to size to save money) and those longer, thicker paint stirrers. This allows for all to be able to use at the same time or for some to sit for a few days without being touched. These purchases will help out in the future with full classes.


Damp Boxes:

  • I have enough shoe box size to give each of my upper students their own box–both for in person and remote.
  • I walk around with large, under the bed size or sweater size ones, for my beginning students. I just go down the line, with gloves on, and give out each project. I do the reverse for clean-up.


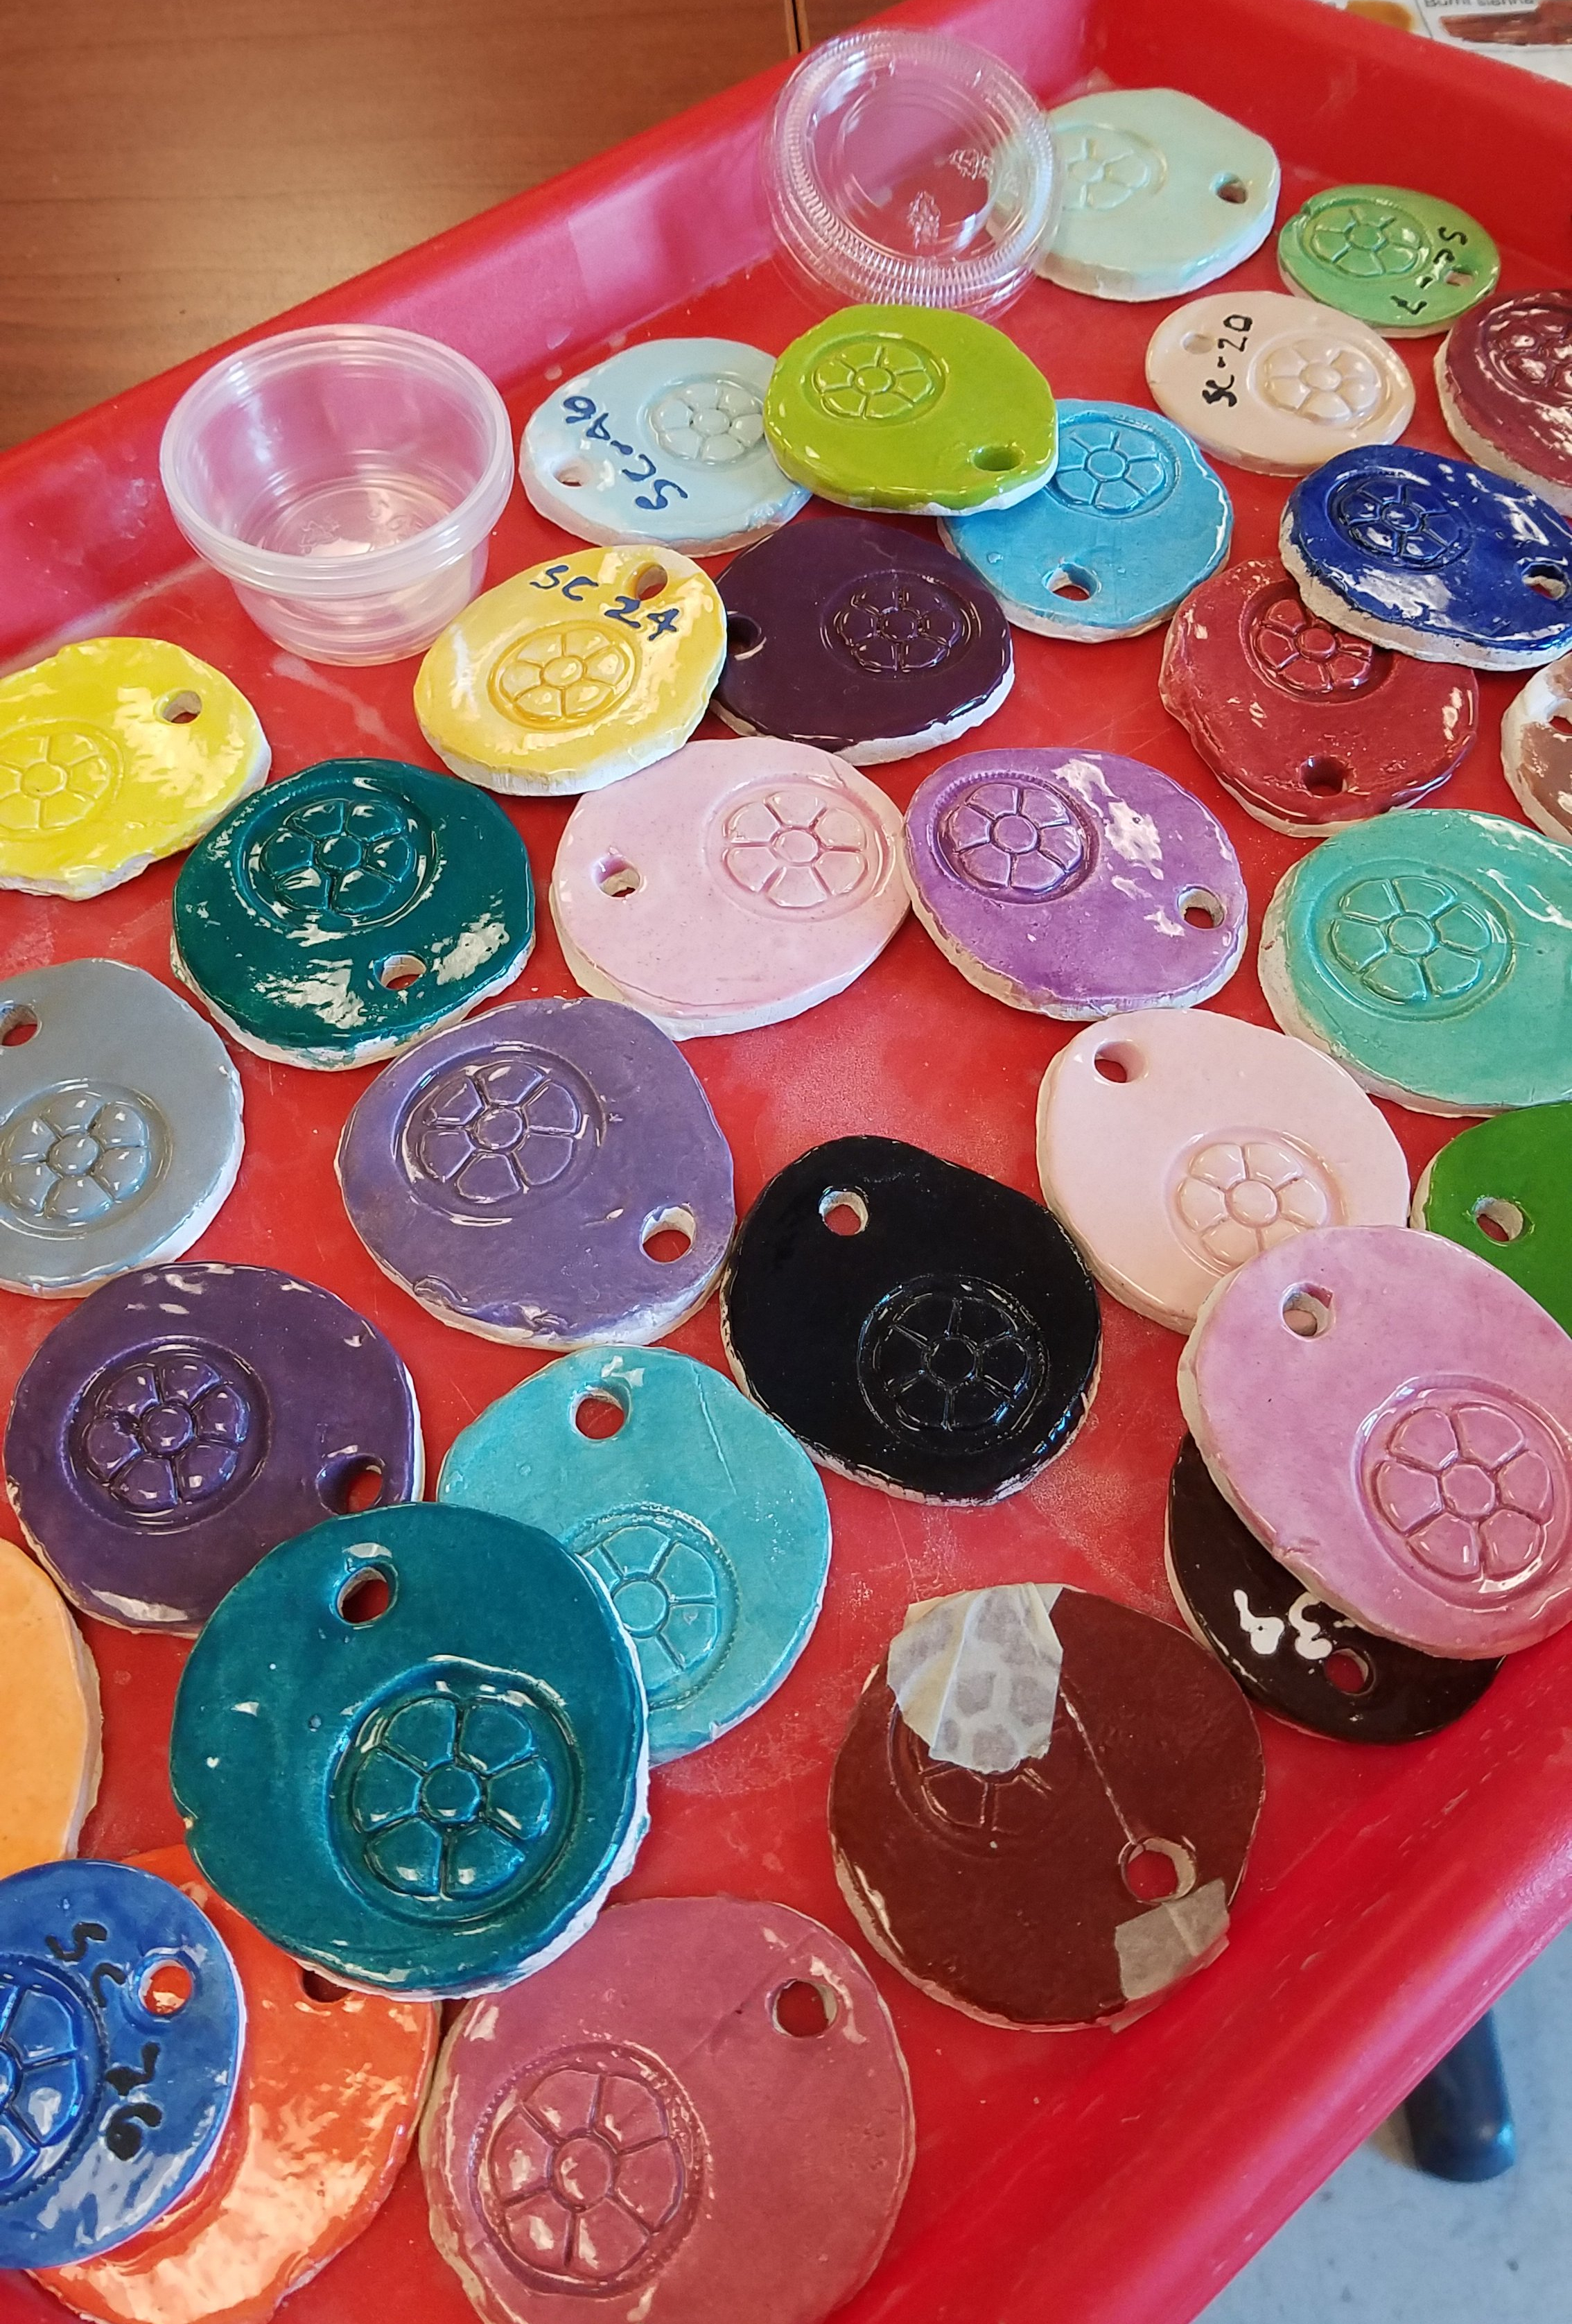
Single Use Condiment Containers with Lids:

  • I originally bought these to send home underglaze to my ceramic students.
  • They come in handy for passing out regular ceramic glazes.
  • I took all my glaze tiles and put them on a tray. Kids can point to the color, and I then mark the cup with the glaze number in a sharpie, and then return the lidded glaze-filled cup to them. They also know what number glaze they had so they can ask for more.

A Zillion Washcloths:

  • Washcloths really are the best way to clean-up clay tables and paint spills. Those school paper towels suck.
  • I bought over 100 of them from Walmart.
  • Each one is “single” use. Student take one from the clean pile and go clean-up their table.
  • They then put the used washcloth in the bucket by the sink after they are done with it.
  • At the end of each week I was the washcloths for next week. I am lucky that I don’t have to take them home–I was given a key to the washers/dryer in the girls athletic area.
  • It’s a little more work, but it is actually cleaner than when we would share the rags–so many less cloudy tables because kids don’t understand to rinse and ring the towels first before wiping the table–because more than likely, the person before didn’t rinse it.

Gloves:

  • The district does supplies me with gloves and I go through 10 pairs a day maybe.
  • Gloves do help to pass out supplies and whatnot to the students…and you will need to pass out a lot. You’ll feel like a waiter, but it is what it is. Lol

I think that is all. I know this is long, but I hope it is helpful to those of you that struggled first semester with having an open studio or those going back to in-person for the first time. Like I mentioned, I sometimes feel like a waiter, and it is tiring many days. My kids like to remind me when I don’t hand out table wipes at the end of the day, and they laugh when I yell that I’m about to take my gloves off so it’s last call for supplies for a while. Undoubtedly, I get someone that needs something like a minute later. ::shrug::

“What’s So TAB…?”

Standard

I often see people asking questions along the lines of “What’s so great about TAB?” Sometimes the question is sarcastic. Other times, you can catch the wif of a true curiosity. Someone who really wants to know why so many have made the switch to this philosophy of “asking what it is that artists do”, and of “believing students are the artists and the classroom is their studio”.

This post is for you…all of you. Both the sarcastic, who *think* they don’t want to know, AND the curious, who *know* they want to know.

There are many things that make Teaching For Artistic Behavior (TAB) great. Many of the reasons are common among TAB teachers, but just as each TAB studio is different, each TAB teacher has her/his top reason for it’s greatness.

Let’s get to it.

  • It’s budget friendly. Whether you have a large budget or a almost non-existent one, since you don’t need class sets of everything anymore, it allows for a wider range of materials and tools.
  • It’s a relationship builder. Because each student is working on a more “independent’ style artwork, you can find out more about each student. Because they are adding more of themselves into each artwork, and because you aren’t policing step by step instructions, you can spend more time talking with them.
  • Deeper Thinking and Connections. I’ve found that when I’ve asked my students to plan the artwork, from the beginning, even with a theme, (instead of me designing the whole unit) my students have gone deeper into the meat of their artwork, and the connections between ideas, themselves and their art have increased ten fold.
  • More Exploration. Letting students decide what medium(s) they want to use and how they want to use them is a game changer in creativity. Students are continually asking me, “what if I?” or “what happens when?” it leads to discovery and conversation and wonderfulness.
  • Differentiation. This one is a big one. Because a TAB teacher is not expecting a student’s work to look like an example, and because we are looking at the underlying aspects of art making (the artistic process, choice making, problem solving, skill building, etc.), it is much easier to meet students where they are, and to help them achieve goals that are suited to them, and not everyone else.
  • A Philosophy, not a Curriculum. TAB is a way of thinking about art education. It’s not a curriculum you can buy on TPT. There are no set lesson plans, no explicit rules to be followed. This allows TAB teachers to be flexible in what they teach and how they convey it to students. It allows for campus and district expectations to be met. It allows for a teachers’ level of comfort when it comes to giving up “control” to the students. It gives teachers flexibility when deciding to follow state or national standards. And it allows for more time to focus on the behaviors of artists instead of only exploring every medium that can be fit in during a school year.

It is that last bullet point that is my top reason for what makes TAB so great. TAB has allowed for so many deep, meaningful things to happen with my students. I’ve seen so much growth and connection making since I changed to TAB. Once I realized it wasn’t about me, but about them, and I changed the way I taught to reflect that…

I have never worked harder as a art teacher than I have as a TAB teacher. Yes, physically I did more work when I taught in a more traditional manner, but I wasn’t as happy. Now, the hard work comes mentally–reflecting on what my students need (which changes year to year, and even from semester to semester), reflecting on my teaching practices, reflecting on myself as an artist and a member of my school community, and how I can bring those things into what I am teaching. It’s draining, but so worth it and fulfilling.

If you are a TAB teacher, what is your top reason for why it’s so great? If you are not, what is stopping you from really checking it out?

Working with “The 10”: Ceramics Packet Reflection

Standard

My friend, Ian Sands, developed a system called “the 9“.  They are packets based around the basics of subjects of art that artists create.  It’s not about content, but more about category that art would fall into.  The packets include: the object, architecture, nature, landscape, figure, portrait, imagination, non-representational, and conceptual.  He introduced them to me some time last school year, and I thought they were wonderful.  I’ve been successfully using them with my art 1 students this year.  They are a great introduction to art categories, while allowing my TAB students to make lots of meaningful choices.

I tested them out last year with one of my classes, and thought that they would be a great tool for working with my ceramics students as they move along their artistic journey.  Sometime last spring, I began planning how to use Ian’s model for my ceramics program.  I began researching and decided that for the most part, ceramics artists’ works fall into most of the same categories.  But, I discovered that there are 10 categories, instead of 9.  They include: nature, animal, architecture, “figure”-ative, functionality, imagination, non-representation, portraiture, the object, and conceptual/installation.

Following Ian’s template, I created consideration questions for each packet, changed up the suggestions and geared the planning around requirements I have for my students.  I am very happy with the development of my packets.

Now, here’s where I am dissatisfied with “The 10”.  I rolled them out in a way that I find isn’t working the way I hoped.  I thought it would make my students more independent, so I introduced it with my intermediate and advanced students.  (They meet at the same time.)  I think this was my mistake.  I should have used it with my beginners after we completed the “have-to” portion of our class.  Seeing how my art 1 students are growing using “The 9”, helped me to see this.  Currently with my beginners, we do ceramic artistic behavior units right after finishing our “have to” section.  We just began our first unit, Ceramic Artists are Inspired by Nature, but I think that after this unit, we will pass out sketchbooks and move onto the next packet.  Nature is one of the packets after all.  We will continue through the rest of the year going through packets, picking up next fall with where we left off.  Then we will dive into deeper meaning with Ceramic Artistic Behavior units.

I will continue with my upper ceramic students in the way we are working. With the exception of one student, they are all seniors, and I’m not too worried about it.  They are working and learning and growing.

They say it takes 3 years to really build up a program.  Like I previously stated, this is the 5th year of the program.  I’ve been playing around with it, trying new things each year to replace things that weren’t working.  I feel I finally have a great grasp on the program and the progression it should take to truly have my students behaving and thinking like artists.  The timing of “The 10” was the final piece of the puzzle that finally fell into place.


Screen Shot 2018-11-01 at 9.05.55 AM

Example of “The 10: Nature Packet”


Artists Curate

Standard

This unit was something I have been wanting to have my art students do for some time, but it never seemed to be the right time.  Well, in January of 2018, I looked at my art 2 students and decided this was the group that could pull it off.  And, I was right.  While not every student hit it out of the park, most did…in one way or another.

This was my final unit for my art 2 students.  We spend over 6 weeks working.  It will also double as their final exam.  Here is the information students were given about the curation of a show.  They were given a few days to figure out what they wanted to do, then they jumped into the work.

This unit was amazing.  Most students decided to curate a show of their own new work.  I’ve never seen so many of my students jump in and work constantly–walking in the room and getting right to work.  They were passionate about what they were creating because it was all them…I had no say in what they could create.  They came up with their own themes for their shows, and figured out what type of create to meet that theme.  One group of 3 boys had originally decided to curate past work they had made, but out of no where began to collaborate on a large panel piece of a dragon in space.  I was thrilled by how well they worked together.

About a week prior to the hang, they made flyers to advertise their shows.  They hung copies in different areas of the school and we added information to the cafeteria announcement slides.

Finally the day came to hang their show.  I gave them some pointers on how to hang their art on the walls of the student centers, and then let them go.  In addition to hanging their pieces, they added labels and a show/artist statement.  They all look so fabulous.   I am so proud of my students.  And, the comments from others around the school have all been so positive.  I know my students are proud of their work.  I can tell, even if they won’t admit it to me.

The show will be up for a week, and on it’s final day we will have a closing reception with some small snacks, drinks, and a “guest book” for each student that people can sign.  Next week, I will meet with each student individually to talk about their curation experience and together we will decide on a grade for their exam.

I am really glad that I finally was able to do a unit like this.  I really like to show off what my students create, but usually it just gets hung in the fine arts hallway.  It really showcases the students and their talents.

2 Weeks of Exhausting Fun

Standard

September is finally here, and for me, it marks having the first 2 weeks of school in the books.  It’s been exhausting and I have had to stop my personal exercise regime because of it. BUT, it has been so worth it.  My new (and returning) students and I have had a blast and have rocked it.

Screen Shot 2016-09-03 at 10.52.36 AM

I don’t like to start off the school year in a traditional way.  I like to have my students jump right in and get busy getting messy.  On our first day, we had 20 minute classes, and I was required by my admin to go over certain things during certain periods.  But, that did leave me time to show a small video to hopefully get my kids thinking about my class and art making in a different fashion.

Over the summer, or maybe it was last year, I found this video by artist and motivational speaker, Erik Wahl.  I thought it was perfect for some first day inspiration.


The next two weeks were spent doing not one, but two community projects.  First my students prepped, and installed our own Unity Project.  The welding students cut down steal tubing to use as our braces.  My students painted 7′-6″ PVC poles black, and they balled up miles of yarn.  Once the set-up was complete, they began to add their voices, by choosing the identifiers that represented them, then bringing it to life with yarn on the installation.  (I will write more about the Unity Project in another post once it is complete.)
 

Once we were finished with our part in the Unity Project, it was time to play with some clay. I like to start the year working with clay.  The majority of kids like clay, and it gives them some time to get to know me and each other without much pressure.  I use this time to teach some basic clay skills–slab draping, scoring/slipping and other surface treatment techniques, and to have the kids give back to their community.  This is the one piece the students will make this year that they aren’t allowed to keep.  I do ask all my students to create a bowl for out Duck Art Club’s charity fundraiser–Empty Bowls.

Next week, we will finish up our bowls, then move onto exploring the artistic behaviors that are essential to my classes.  I hope my students keep enjoying art class and continue to knock it out of the part when it comes to my expectations as the weeks, semester, and year continues.