Category Archives: bootcamps

A Week of Clay Exploration

Standard

I’ve been a TAB teacher now for more than half my teaching career, and even I still struggle sometimes with creating exploration camps for my students that are open enough to give kids a taste of “new” mediums. One of these that I struggle with is clay. I know, I know, I teach ceramics, how could I struggle with this one? Giving students a week and a half to explore a medium that takes practice to understand is hard. I wanted to give them as much freedom as I could, but still limit some things due to practical aspects such as the amount of clay I have and the many students I have.

I had planned just on letting 2 of my 4 classes explore, but then decided I was too lazy to have 2 different explorations going on at the same time. And, I’m glad that I had all of them explore. Out of my almost 100 students, I had 95% engagement all week. I had about 3 kids decide they never want to touch clay again and I had several kids say they are signing up for ceramics next year–kids that I thought would stick with our 2D path. So, bonus for me and my program.

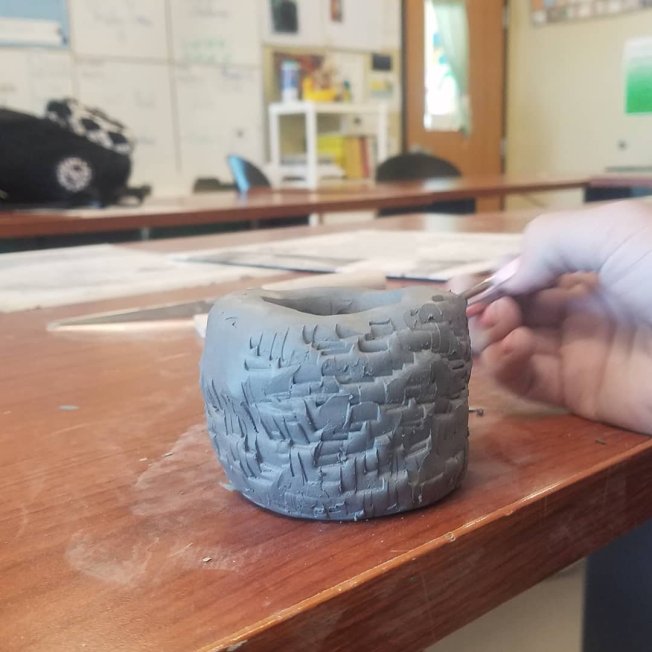
How did I run the exploration camp? I showed 2 quick demos on Monday, pinchpot and coil, with lots of finished examples of pieces created using those methods. Then on Tuesday I showed slab building. We talked about the term vessel, a hollow container, and how I was very open to how they could interpret that term. Then I let them go. They were to build a vessel of their choosing with any hand-building technique or combination of them they wanted.

If you have a lot of kids working at once, I would advise creating some damp boxes to help store as the kids work all week. See this post on how to create a damp box. It was a game changer on storage and keeping 90+ pieces workable all week. And, over a weekend for the handful that needed/wanted more studio time. I had been wanting to make some for my ceramic students, but never had time. This week forced me to make them. So glad I did.

I don’t have many pictures to share this time as we were having so much fun, I got caught up and forgot to pill out my phone.

Artists Abstract/Don’t Represent

Standard

Normally I teach both abstract and non-objective art in a full-on unit.  This year I decided to revise that.  While I think the information included is important, it was information that could be learned in a shorter amount of time…with the right activities and check-ins.  I am lucky as our school is 1:1 and has a set of TVs at the front of the school that we can hook in to.

Day 1: Each class broke into 5 equal groups.  They brought one computer with them and we headed to the front of the school.  Each group hooked into a tv, and they were asked to first define both abstract and non-representational/non-objective.  After that, each group went thru a slideshow and determined if an image was abstract or non-objective, based on what they had discovered in their definition search. At the end of class, we went thru the slideshow as a whole class.

Day 2: We briefly went over the definitions of each style of art.  The students then were to watch 2 videos through playposit.  One video was on Joan Jonas and the other was Soo Sunny Park.  They students had to determine which artist would be considered abstract and which was non-objective.  They also had to say why.  This was really to stress the difference between the two genres and to let them see 2 artists at work.

Day 3:  At the start of class, we had a check for understanding where kids defined each term, said what they had in common and what made them different.  Then it was time for was our image find day.  Each student had to create a document that contained 10 images.  Five of the images had to be abstract.  Five had to be non-objective.  They also had to say why they chose those images–what drew them to those pieces.  I like having them do this because it causes them not to choose the first 5 they find and to really search through a ton of images.  Furthermore, it gives me some behind the scenes info into art they find intriguing.

Days 4-6: These were studio day.  Students chose which type of art they wanted to create, then had 3 days to create that art.  It was awesome.  The first day about 60% of students were working, but by the second day, 95% were working and not rushing thru.  I was very pleased with the conversations and the engagement by my students.

Day 7:  Our final day of the bootcamp was reflection day.  I asked students to fill out a google form.  I asked them again to tell me the differences and similarities between abstract and non-objective.  I asked them what genre their artwork fell into.  Then I asked some opinion questions about the bootcamp and abstract/non-objective work.  With the extra time left that period, kids could finish up anything they hadn’t gotten to over the past 3 studio days.

This was a huge success.  It wasn’t so long that they eventually lost interest. And, it was focused and narrow enough for 95% to understand the two concepts.

A New Approach to the Bootcamp

Standard

Well, it’s a new bootcamp approach for me and my students. Normally when we do bootcamps, there are many demos by me. And, since I don’t want to spend the whole class period doing demos, it ends up being one per day and then work time. So, each approach is learned separately. Granted, this has been okay for our drawing bootcamps and painting bootcamps. Last year I followed this approach for printmaking as well. It was kind of a disaster. Most kids didn’t really learn much, they whipped through each technique, and they wasted a lot of materials. So, this year, I decided we needed to do something different.

My school is 1:1 MacBooks, and it is an expectation that we include a technology component. I thought this would be a great way to meet that expectation and change up the bootcamp. This year, I would expect the onus of learning the techniques on the students. We talked about how this bootcamp would be different and that they were the ones to watch the demo videos for the technique they needed to learn. I would only be doing one demo–inking and pulling prints.

I create a Google Slides with my expectations for the bootcamp and shared it with my students in Google Classroom. At the start of the bootcamp, we went over it. I expected that each student would learn a minimum of one printmaking technique. They students could decide to either work alone or in groups of up to 4 people. Each group had to make 3 copies of an artwork that utilized different printmaking techniques. AND, they couldn’t repeat techniques in their piece. So, for example, a group of 4 had to create an artwork that had 4 different printmaking techniques. If you worked alone, you had to learn 2 techniques.

While I have 2 things I need to revise for next year, and I will get to those in a minute, I think overall this was a success. The majority of the kids watched multiple video demos before making decisions on what they wanted to learn. They communicated with others on the artwork creation and learned from each other when they had questions about techniques. Of course I had those that needed more attention than others, and I had some that needed modified requirements, but that is normal in a TAB classroom where differentiation is a common occurrence.

The biggest thing I have to revise is HOW I deliver the information and expectations to the students. The multiple copies aspect of printmaking was a difficult concept for many. I also want to look at the time line for next year. The students had 8 studio days (48 minute periods) to create and do a google slides for a presentation. I think I need to make it a full 2 weeks (10 days), not including a day for presentations.

I am proud of my students. They worked hard and learned way more than they realize. I plan on trying to incorporate this type of bootcamp into our future bootcamps. I am glad that I put the learning was put on their shoulders because it allowed me more time to observe and interact with my students.