Category Archives: organization

Typical Days in the HS TAB Studio

Standard

As we get closer and closer to the start of the year, many people are asking what a typical day in the high school TAB studio/classroom is like. And well, it’s anything but typical. Just kidding. TAB classrooms are just like any other art classroom, just there is more independent thinking happening and less teacher-led projects. But, other than that, it’s pretty normal. We have routines just like any other classroom.

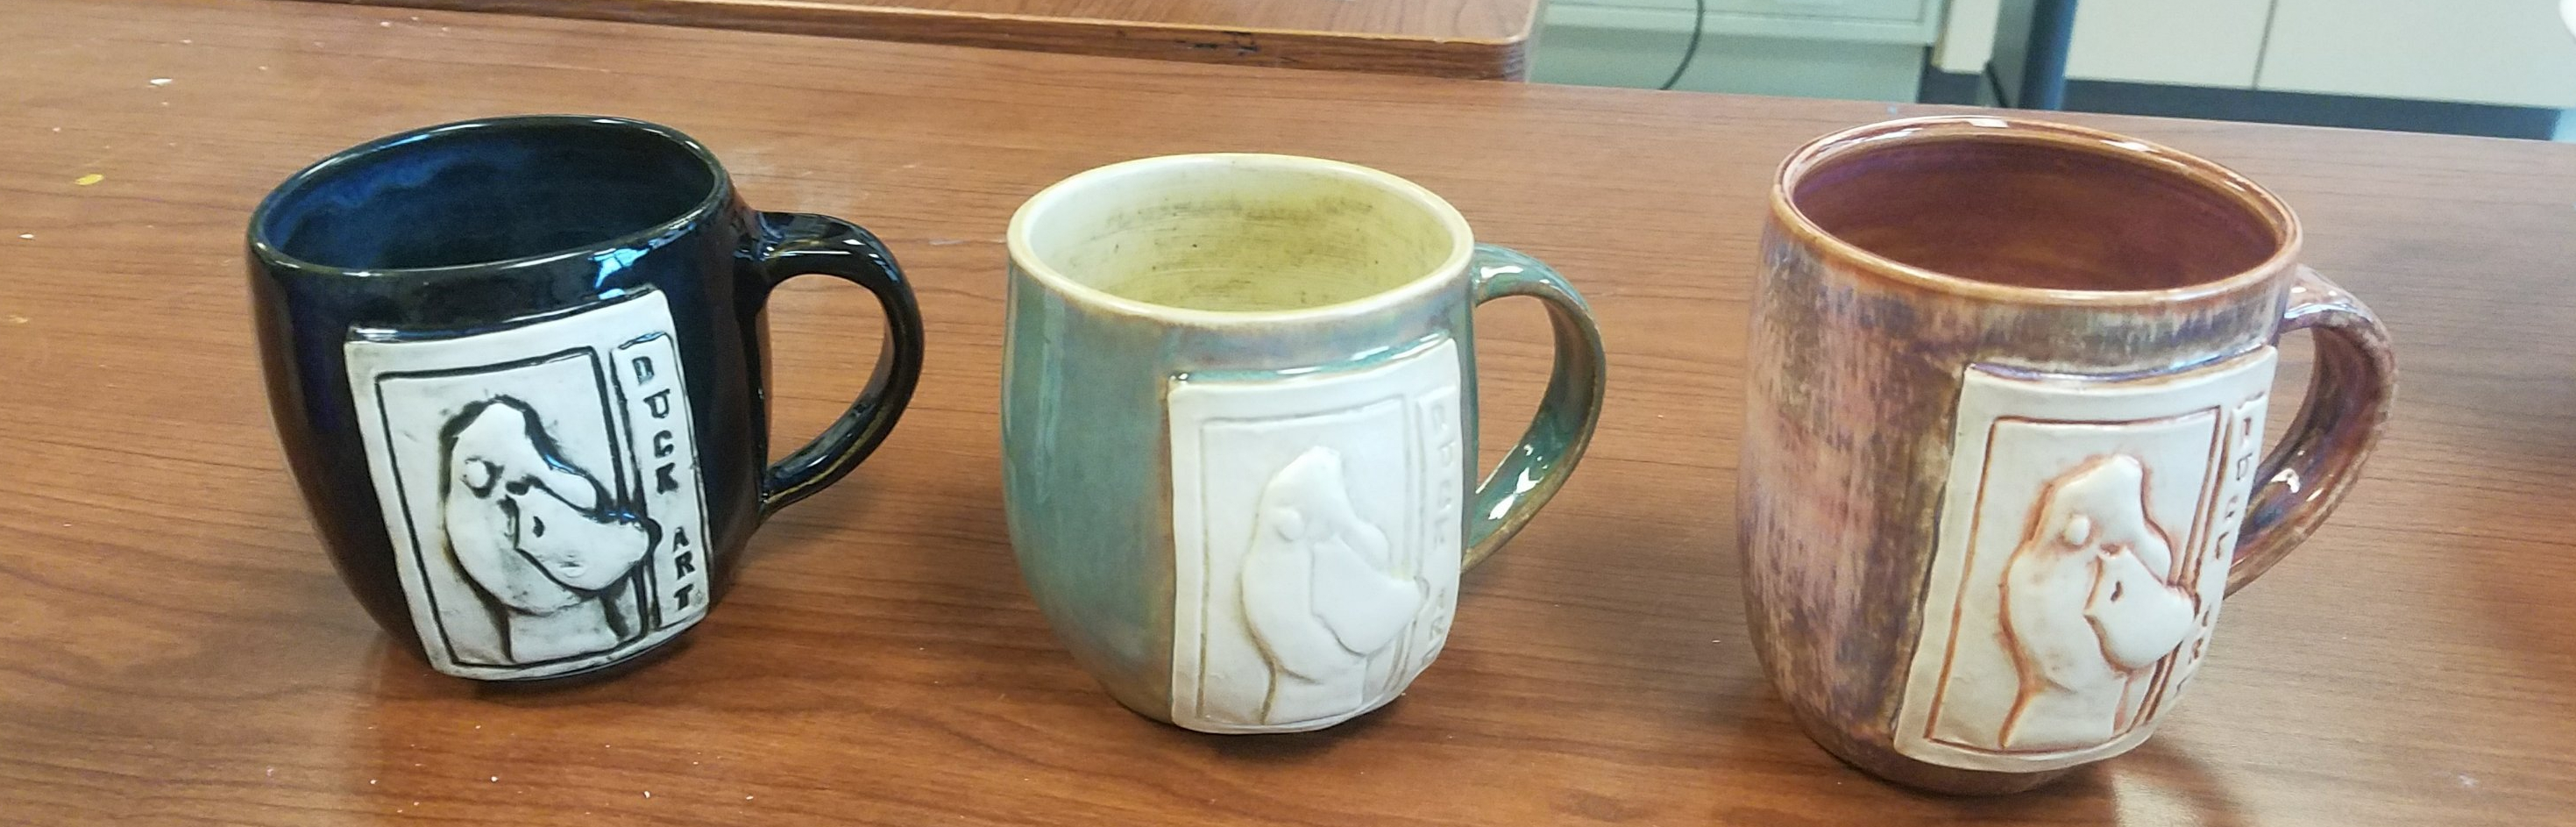
I thought I would create a small post outlining my day and my week as a high school TAB teacher. I see my students daily, all year long. This year we are back up to 50 minute classes. Woo hoo!! I teach Art 1, Art 3, and beginning through advanced Ceramics. Sometimes I teach AP or an Art 4, but those are on case by case bases. Unless it’s AP 3D, then that’s definitely me.

I like to have a routine that my students get used to, so they are comfortable and there’s not huge chaos every day. I have a white board, which when my room is not under construction, the students pass by as they come into class and they are encouraged to read the board so they know what they need to get out.

Mondays start off with either Artist Monday or Style/Movement Monday, for all my classes. We come in, watch a video and then the students answers questions, either in their sketchbooks (art 1) or on a slide deck (everyone else). That generally takes about 15 minutes of class total. After that, we go into one of 2 things, we get back to notes/practice of skills or studio time. Every other Wednesday, in art 1, we have a drawing test. Then, similarly to Mondays, the students pick up where they left off the day before. In my upper classes (art 3 and ceramics 2 & 3), I designate a day (usually every other Friday) for digital portfolio time.

Beyond those few fixed things, I typically don’t like to take much of the time away from arting. Kids will ask me what are we doing, and I say to look at the board. At some point, whether they need their sketchbooks or not, art 1 students will come in and grab it before sitting down. It has become a habit. Sometimes I address the class right at the beginning to do some house keeping, like reminding students of who I still need to go over ideas and development or when the last studio day for a unit is. Other times, I just let them get to work and don’t address the whole class until about 7 minutes left when it’s time to come to a convenient stopping point to begin clean-up.

When we do need to learn new skills (composition, perspective, facial features, etc.), we sit and take notes in our sketchbooks. After there is usually a small assignment in their sketchbooks to practice the new skills. New media explorations take about a week, while other smaller skills assignments take between 2-3 days (notes and practice time together.) When I do demos, where we (students and I) aren’t doing them simultaneously, I try to keep them under 10 minutes. That way, they still have at least a half hour of arting time.

There you have it. The biggest difference in my experience between when I was a more “traditional” teacher and a TAB teacher is that there is much more independent art making and exploring time. I circle the room more and talk to students more. There is not magic secret or formula. This is what feels right for my students and for me. It’s relaxed and safe and successful.

Classroom Protocols in the Time of Covid

Standard

I know it’s been a while since I last wrote. It’s been, well, it’s been a semester–interesting, frustrating, at times apathetic, and at other times guilt-ridden. I am sure most of you know what I’m talking about. I thought I would start off the new year with trying to look at the positives, with hopes that I can help some people. We spend 2/3 of the first semester doing both in-person and asynchronous. Like other in-person art teachers, I had to figure out material procedures that worked within restrictions handed down from on high–no group work, no sharing, single-use if possible.

I run my TAB studio in a very self-serve type of environment. Unfortunately this year, that wasn’t feasible and I didn’t set up the studio as normal. ::sad face:: Fitting the expectations set out for me to work into an open studio was frustrating, but over the 3+ months I’ve had students in my room, I’ve been able to come up with strategies to make it work. I do have less than half the students I would have normally in my room, and my largest class was 12 (half my normal cap BUT it was a ceramics class, so that made things interesting.) Fewer students does make some things easier, I will admit, however, I did need to order a bunch of supplies that I wouldn’t normally order–more new brushes, lots of extra tools, extra sets of some media, single-use condiment containers, mesh bags. But in the grand scheme of things, it will help out in the future as there are some things I think I will continue using and doing after we return to a more “normal” school life.

Let’s do this…

Time Out area:

  • I got this idea from another Texas TAB teacher, Lori Wallace. Not sure if it was her idea or not, but it’s a super awesome idea.
  • It’s an area on my counter that I marked out as the time out area with some tape. (A student thought we needed a fun zone too, so there is that section next to it labeled as such.)
  • Students put all used tools and materials there, so at the end of the day I can sanitize spray them.

Clean Cups and Dirty Cups:

  • In a few different places, I have 2 sets of plastic cups–some labeled clean, and some labeled dirty.
  • Cleaned tools (pencils, sharpies, skinny paint brushes, etc) are in “clean” cups.
  • After student use, they put the tool in a dirty cup (this includes hand sharpener and erasers).
  • I wipe down the hand tools with the provided sanitizing wipes at the end of the day, and then put them back into the clean cup.

Mesh Bags:

  • I bought these mesh bags with a local grant, about 80 or so of them. I use them for many things: sets of acrylic brushes, sets of watercolor brushes, ceramic students individual tools, sets of brush markers.
  • What makes them nice is that after the students use whatever is in them, they can put the bag in the time out area, and I can just spray the bag, turn it over, and spray the other side. The bag is mesh and plastic, so it gets the inside contents and allows for drying.
  • This will be something that continues next year…using the bags for sets of things.

Materials List/Paint Color List:

  • I made a list of all the different media I had to offer and a swatch of all the acrylic paint colors I have. I then laminated them and taped them down–one on each desk
  • Students can tell me what medium they would like and I can get it for them.
  • Students can tell me what paint colors they need, and I get those too.
  • This lessens the amount of hands touching things–I wear gloves to get the different media.
  • I don’t have to worry about sanitizing the paint bottles after each use because I am the only one touching the bottles.
  • I put a piece of copy paper on each paint tray (cafeteria type trays), squirt on the selected colors, and give the students their paint. They throw out the paper and put the tray in the time out area.

Individual Student Tool Sets:

  • This is mostly for my ceramic classes. This was costly, but there wasn’t really any other way. Tool kits were made; some sent home (and they come back when kids come back), and some stayed for in-person.
  • Each student has their own cubby where they keep their tool bag. I repurposed my cubby since I didn’t set up the studio as normal.
  • Each kit has a needle tool, a serrated metal scraper, a wide paint brush, a home-made sgrafitto tool (that each student made themselves), and a piece of canvas. I also bought a ton of wooden dowels (which I cut down to size to save money) and those longer, thicker paint stirrers. This allows for all to be able to use at the same time or for some to sit for a few days without being touched. These purchases will help out in the future with full classes.


Damp Boxes:

  • I have enough shoe box size to give each of my upper students their own box–both for in person and remote.
  • I walk around with large, under the bed size or sweater size ones, for my beginning students. I just go down the line, with gloves on, and give out each project. I do the reverse for clean-up.


Single Use Condiment Containers with Lids:

  • I originally bought these to send home underglaze to my ceramic students.
  • They come in handy for passing out regular ceramic glazes.
  • I took all my glaze tiles and put them on a tray. Kids can point to the color, and I then mark the cup with the glaze number in a sharpie, and then return the lidded glaze-filled cup to them. They also know what number glaze they had so they can ask for more.

A Zillion Washcloths:

  • Washcloths really are the best way to clean-up clay tables and paint spills. Those school paper towels suck.
  • I bought over 100 of them from Walmart.
  • Each one is “single” use. Student take one from the clean pile and go clean-up their table.
  • They then put the used washcloth in the bucket by the sink after they are done with it.
  • At the end of each week I was the washcloths for next week. I am lucky that I don’t have to take them home–I was given a key to the washers/dryer in the girls athletic area.
  • It’s a little more work, but it is actually cleaner than when we would share the rags–so many less cloudy tables because kids don’t understand to rinse and ring the towels first before wiping the table–because more than likely, the person before didn’t rinse it.

Gloves:

  • The district does supplies me with gloves and I go through 10 pairs a day maybe.
  • Gloves do help to pass out supplies and whatnot to the students…and you will need to pass out a lot. You’ll feel like a waiter, but it is what it is. Lol

I think that is all. I know this is long, but I hope it is helpful to those of you that struggled first semester with having an open studio or those going back to in-person for the first time. Like I mentioned, I sometimes feel like a waiter, and it is tiring many days. My kids like to remind me when I don’t hand out table wipes at the end of the day, and they laugh when I yell that I’m about to take my gloves off so it’s last call for supplies for a while. Undoubtedly, I get someone that needs something like a minute later. ::shrug::

Corona and Remote Teaching

Standard

I see it has been over 2 months since my last post. And, quite frankly, I’m not surprised. I had some ideas in the works for new posts on the exciting stuff and things happening in the Duck Art Room since January, but then Corona hit, and my spirits plummeted.

I tried with all I had in me to look the “new normal” in the eye and take it on. And by new normal, I mean remote teaching or distance learning or “homeschooling” 🙄🙄🙄. (Don’t get me started on how none of this is homeschooling. I know people that homeschool for a living, and this is not it folks. But I digress.) It was hard. I wanted to be the best teacher I could be, but in truth, I wanted to just paint and drink coffee and play with clay. And I’ve done all that. In fact, by the end of this, I will have a full kiln load of just stuff I made.

One week away from school turned to two weeks; then to three weeks. And now, I’m pretty sure we won’t be back this school year. And at this point, while I want to see all my kids more than anything, I don’t know how we could make the switch one more time with 7 weeks (in my district anyway) of school left — 3 of which we are definitely out for Shelter-In-Place orders.

My district has been remote teaching/distance learning for 3 weeks now. I feel it has all been one big trial and error session. My district finally came to a decision about grading and GPA and class rank–which for those of you who teach high school know that these things are currently important in the world of education and higher education. I won’t go into everything, but we are going to a pass/fail system for the second marking period of the 2019-20 school year. Grades will be assigned with “prominent emphasis on completion and effort”. So, that sounds good right. It sounds as about as equitable as they can get. We are trying very hard to make sure we can meet accommodations and reach students without internet and give grace to those struggling with home issues (siblings, work, etc.) that affect them being able to do school work. Could more be done? Probably. But I know we are trying.

What does this all have to do with Art and Teaching for Artistic Behavior and Duck Art? A lot actually. I said that my spirits had plummeted, and that included my spirit for facilitating meaningful art making situations for my students. Instead, I assigned what I felt was going to be the easiest thing for me to do. Currently, I have about 50-65% participation from my students–some do all of it, most pick and choose and turn in a thing here or a thing there. It made me sad to say the least. I was missing seeing my kids make and create and all those other things that go with being artists.

Earlier this week, I was looking at Facebook, like all who are at home do, and I finally clicked on my friend Melissa Purtee’s post about what she was doing remotely with her kids, and it sparked something in me. I was then reminded of a post another friend had put in the main TAB Facebook group about not forgetting our purpose as TAB teachers–those 3 main tenets of the philosophy. I knew I had to change what I was doing. I couldn’t sustain it anyway. So, I borrowed from Melissa, as she so graciously lets us do, and made a new website for my students–all of my students, no matter the level or the class type. It gives them choice. It lets them decided how to spend their time during the week–instead of a daily assignment, they know what they need to do for the week on Monday and can plan their schedule to meet their needs. It makes them think and decide and research and plan and all those behaviors we have been talking and learning about for months or years. I have full belief in my students and I am hoping that it is what is right for them, and for their situations. I hope they can see art making not as a thing they have to do, but they want to do–because the freedom is in their hands now.

I’ll leave you with this. I’m not sure how I feel about our “New Normal”. I just hope I am bringing a sense of comfort to my students thru art and choice as we navigate this together.

Screen Shot 2020-04-11 at 10.08.03 AM

Click image for website

Damp Boxes: Classroom Clay Game Changers

Standard

I wanted to share a clay storage system that will change the way you can store in progress clay pieces. It’s called the damp box. I had heard about these quite some time ago, but for a myriad of reasons, I never got around to making some. My recent clay exploration camp kind of forced my hand on the issue, and I’m so glad I finally made them.

Basically they are plastic containers with plaster in the bottom. The plaster is damp and when the box is closed, it creates humidity in the box, which helps keep the pieces workable for extended amounts of time.

For years when I had around 100 kids working with clay, I had to wrap up pieces. I tried different methods each time, but always had kids pieces drying out too much each time due to several factors. This time, kids pieces remained malleable, even if they were absent for a day or two. And, I didn’t have to worry about making sure the boxes were closed. The kids did all the work. It helped to make the week go much more smoothly.

How do you make a damp box? Here is a video created by Tim See, a professional potters who I “met” on a clay Facebook group.

I ended up making 3 large, flat boxes and 2 smaller ones. I plan on making a few out of taller bins for bigger pieces. But the shallow ones worked out well for the clay exploration camp as most pieces were just a few inches tall.

These boxes are a game changer for me, and I hope they can be for you as well.

A Week of Clay Exploration

Standard

I’ve been a TAB teacher now for more than half my teaching career, and even I still struggle sometimes with creating exploration camps for my students that are open enough to give kids a taste of “new” mediums. One of these that I struggle with is clay. I know, I know, I teach ceramics, how could I struggle with this one? Giving students a week and a half to explore a medium that takes practice to understand is hard. I wanted to give them as much freedom as I could, but still limit some things due to practical aspects such as the amount of clay I have and the many students I have.

I had planned just on letting 2 of my 4 classes explore, but then decided I was too lazy to have 2 different explorations going on at the same time. And, I’m glad that I had all of them explore. Out of my almost 100 students, I had 95% engagement all week. I had about 3 kids decide they never want to touch clay again and I had several kids say they are signing up for ceramics next year–kids that I thought would stick with our 2D path. So, bonus for me and my program.

How did I run the exploration camp? I showed 2 quick demos on Monday, pinchpot and coil, with lots of finished examples of pieces created using those methods. Then on Tuesday I showed slab building. We talked about the term vessel, a hollow container, and how I was very open to how they could interpret that term. Then I let them go. They were to build a vessel of their choosing with any hand-building technique or combination of them they wanted.

If you have a lot of kids working at once, I would advise creating some damp boxes to help store as the kids work all week. See this post on how to create a damp box. It was a game changer on storage and keeping 90+ pieces workable all week. And, over a weekend for the handful that needed/wanted more studio time. I had been wanting to make some for my ceramic students, but never had time. This week forced me to make them. So glad I did.

I don’t have many pictures to share this time as we were having so much fun, I got caught up and forgot to pill out my phone.

Working with “The 10”: Ceramics Packet Reflection

Standard

My friend, Ian Sands, developed a system called “the 9“.  They are packets based around the basics of subjects of art that artists create.  It’s not about content, but more about category that art would fall into.  The packets include: the object, architecture, nature, landscape, figure, portrait, imagination, non-representational, and conceptual.  He introduced them to me some time last school year, and I thought they were wonderful.  I’ve been successfully using them with my art 1 students this year.  They are a great introduction to art categories, while allowing my TAB students to make lots of meaningful choices.

I tested them out last year with one of my classes, and thought that they would be a great tool for working with my ceramics students as they move along their artistic journey.  Sometime last spring, I began planning how to use Ian’s model for my ceramics program.  I began researching and decided that for the most part, ceramics artists’ works fall into most of the same categories.  But, I discovered that there are 10 categories, instead of 9.  They include: nature, animal, architecture, “figure”-ative, functionality, imagination, non-representation, portraiture, the object, and conceptual/installation.

Following Ian’s template, I created consideration questions for each packet, changed up the suggestions and geared the planning around requirements I have for my students.  I am very happy with the development of my packets.

Now, here’s where I am dissatisfied with “The 10”.  I rolled them out in a way that I find isn’t working the way I hoped.  I thought it would make my students more independent, so I introduced it with my intermediate and advanced students.  (They meet at the same time.)  I think this was my mistake.  I should have used it with my beginners after we completed the “have-to” portion of our class.  Seeing how my art 1 students are growing using “The 9”, helped me to see this.  Currently with my beginners, we do ceramic artistic behavior units right after finishing our “have to” section.  We just began our first unit, Ceramic Artists are Inspired by Nature, but I think that after this unit, we will pass out sketchbooks and move onto the next packet.  Nature is one of the packets after all.  We will continue through the rest of the year going through packets, picking up next fall with where we left off.  Then we will dive into deeper meaning with Ceramic Artistic Behavior units.

I will continue with my upper ceramic students in the way we are working. With the exception of one student, they are all seniors, and I’m not too worried about it.  They are working and learning and growing.

They say it takes 3 years to really build up a program.  Like I previously stated, this is the 5th year of the program.  I’ve been playing around with it, trying new things each year to replace things that weren’t working.  I feel I finally have a great grasp on the program and the progression it should take to truly have my students behaving and thinking like artists.  The timing of “The 10” was the final piece of the puzzle that finally fell into place.


Screen Shot 2018-11-01 at 9.05.55 AM

Example of “The 10: Nature Packet”


TAB, Modified TAB, and Other TABby things

Standard

TAB is a huge buzzword these days. I see it thrown around in many Facebook groups. But what is TAB exactly? TAB is an acronym for Teaching for Artistic Behavior. It is a philosophy that has three core values. It asks “What do Artists do?” It believes the child is the artist. And, it believes the art room is her/his studio. It is these three ideas that drive a TAB teacher’s curriculum…how they run their studio.

That brings me to my next topic, Modified TAB. This isn’t really a thing. A teacher either believes in the philosophy or doesn’t. They don’t really pick and choose which of the values they want to believe. What confuses people is the misunderstanding that being a TAB teacher means you are balls to the wall full choice, all day long. Like I said…this is a misconception of the philosophy. When running a TAB studio, no matter the level, there is a spectrum of choice. The amount of choice a teacher will allow has several variables.

  • Campus/district expectations
    • Some teachers are expected to do x, y, and z. And most of us do like to be in compliance.
  • How “on board” a principal is with the change in the art program.
  • Bootcamp vs studio time
    • bootcamps are short amounts of time where the full class will explore a specific topic such as acrylic paints and color theory or copyright. Bootcamps should last a few days to a week tops. Studio time is where the students create their artwork.
  • Needs of the child
    • Each child is different in their learning styles and how comfortable they are with freedom. TAB is differentiation at its best.
  • Have to’s
    • There are certain things that teachers believe every student needs to know. This could be doing an attachment test to be able to use the sculpture center or biweekly drawing tests that have kids focus on the eye/brain/hand connection.
  • Teacher comfortability with giving up control.

Basically, a TAB teacher utilitizes varying degrees of choice throughout the year, for various reasons. But, they don’t utilize varying degrees of the philosophy.

Teaching in a “TAB-like” way isn’t a thing, but using varying levels of choice is. You can offer choice without being TAB, but you can’t be TAB without offering choice. You are a TAB teacher or you are not. There is not a formula as to how to run a TAB studio. There are as many ways to run the studio as there are TAB teachers. That’s the beauty of it. Believe the philosophy and do what works for you, your population, and your admin…as long as you have student Artistic autonomy as a goal for your students.

For more information about Teaching for Artistic Behavior, visit teachingforartisticbehavior.org

20171027_1535122129426906.jpg

A High School TAB studio with multiple mediums being worked on at the same time.

2018 Texas TAB Lab

Standard

One would think that by now I would be sitting in the sun, sipping margaritas and enjoying my summer.  One would think that if one didn’t know me.  I have 2 kids and the Texas sun is way to hot to sit under all day.  Now sipping margaritas…that’s another story for another day.

Screen Shot 2018-06-18 at 2.06.10 PM

My third week off for summer was spent doing some very important and exciting professional development–the Texas TAB Lab (#TxTABLab).  Lori Wallace and Julie Bates20180613_0938451693010827.jpg 
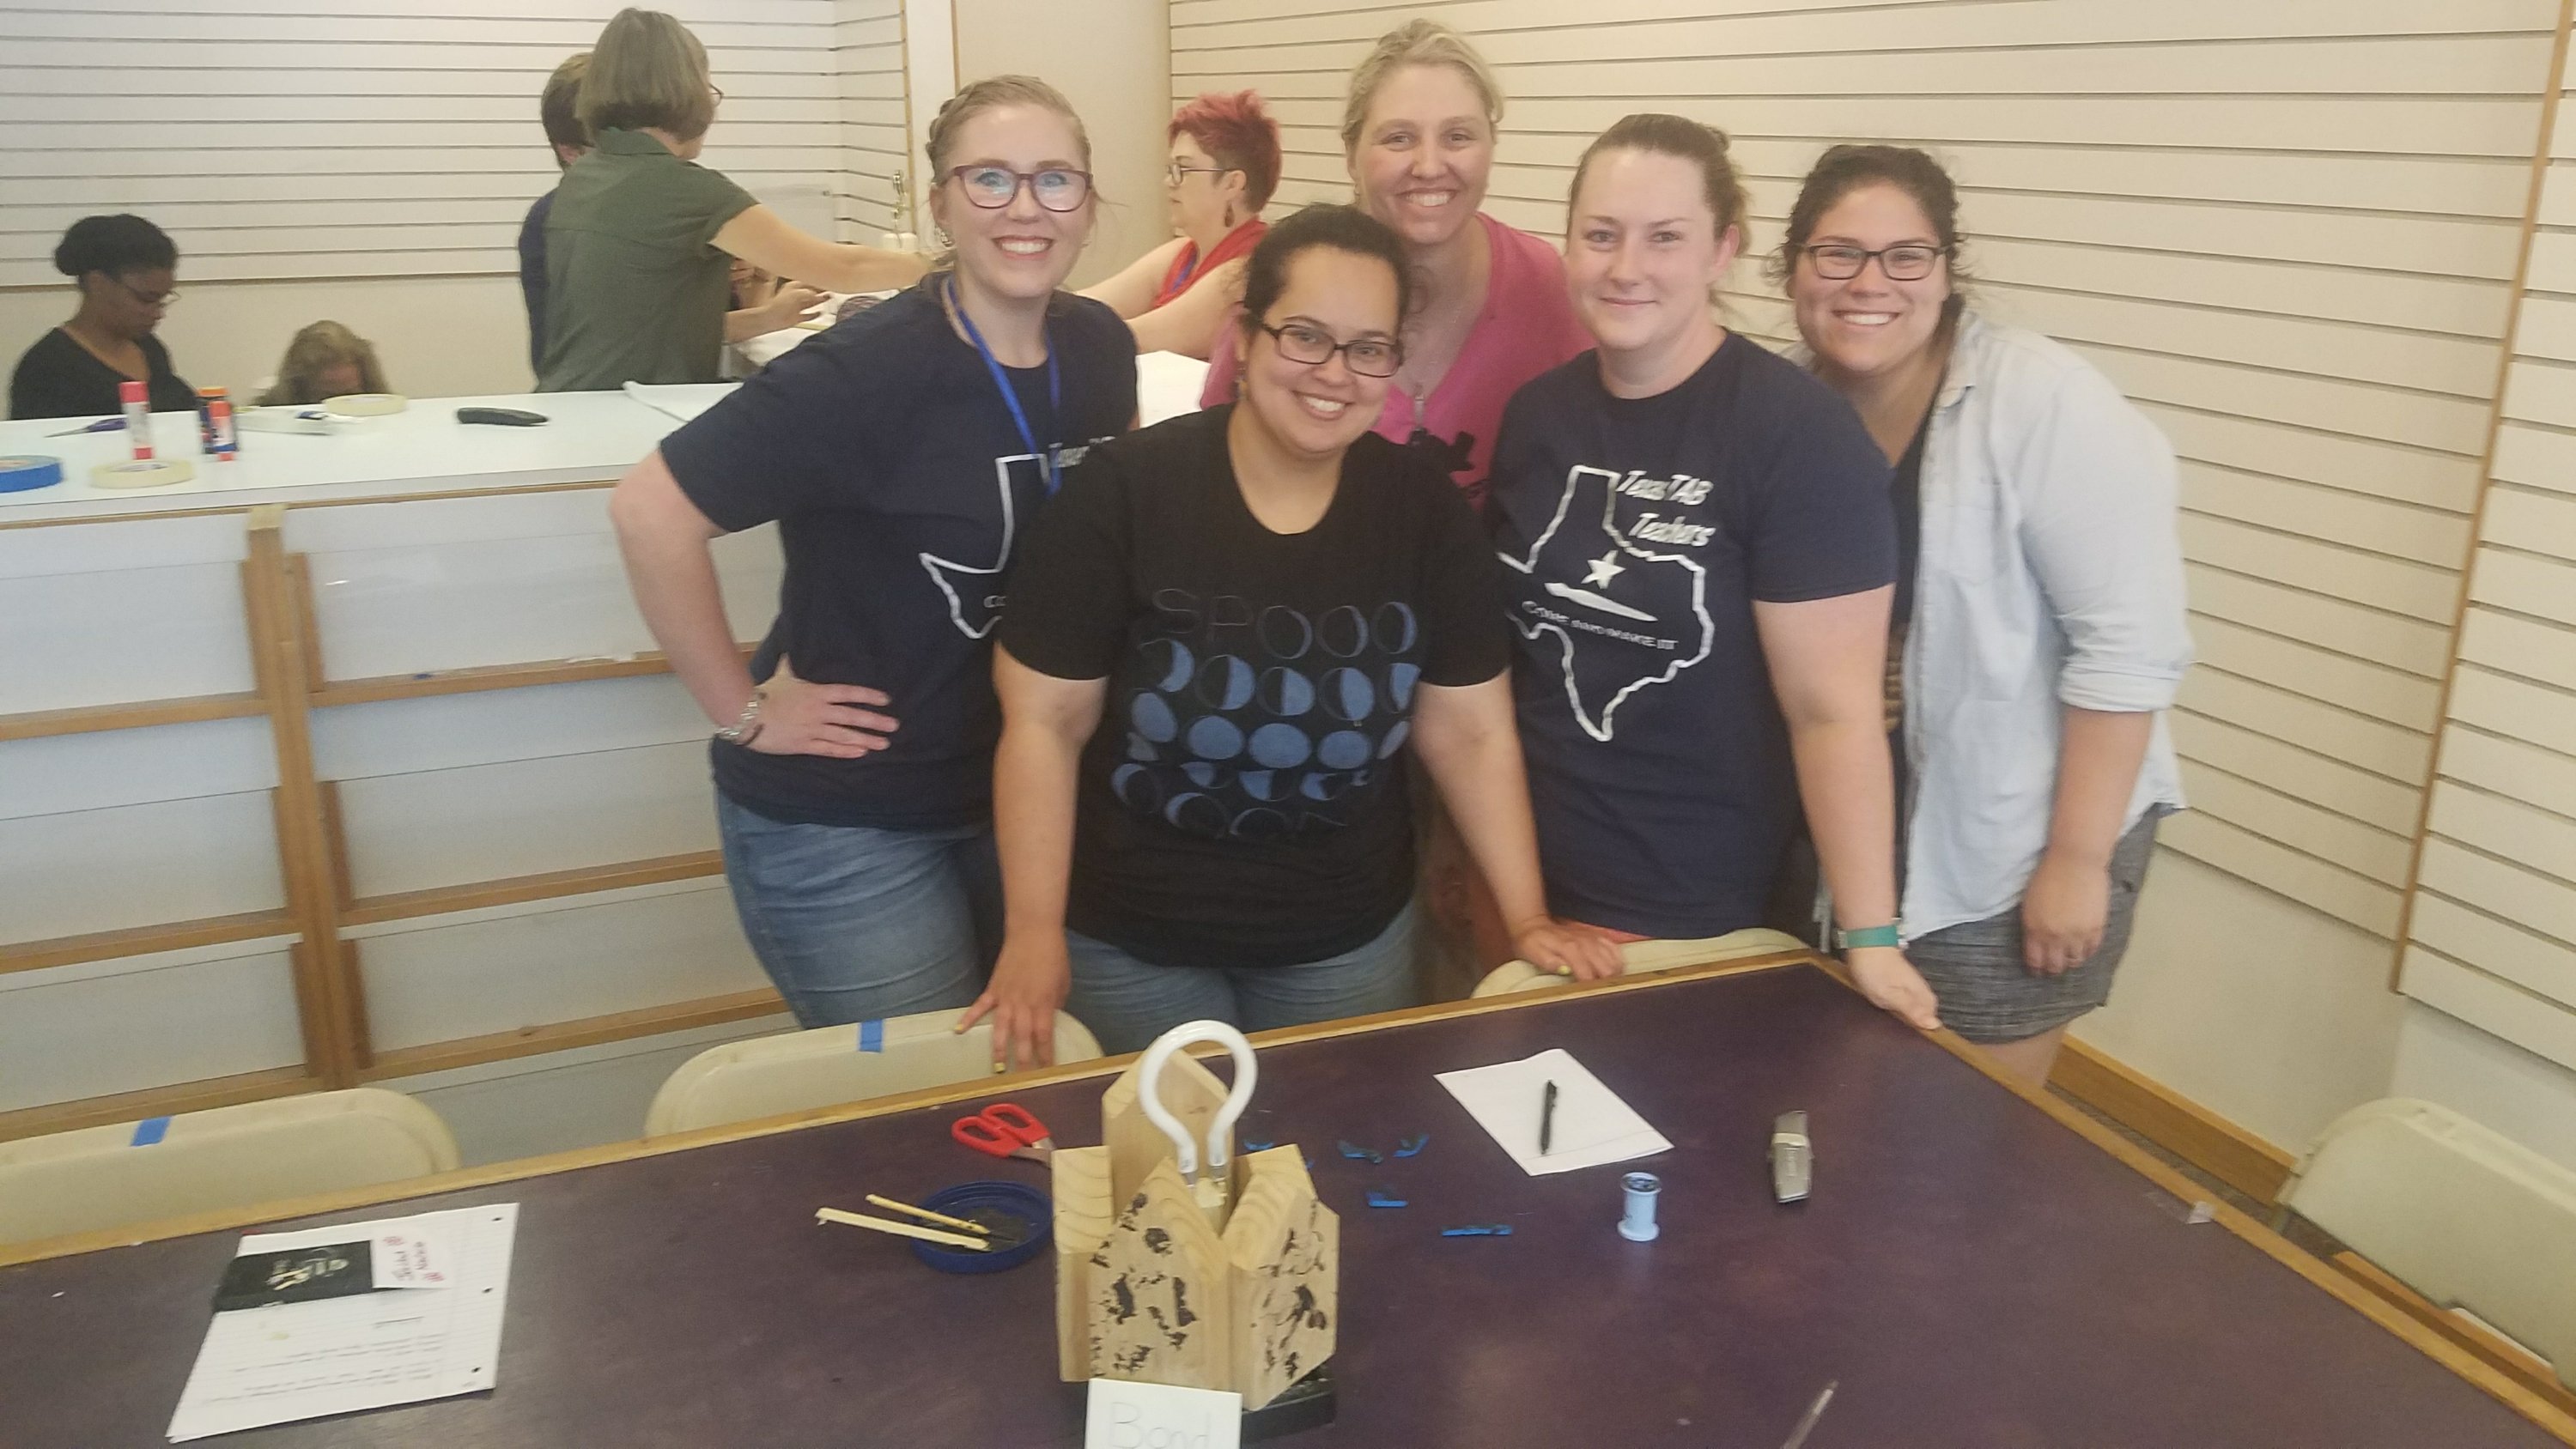
honored me months ago by asking me to help out with this year’s mini-conference, by heading up the secondary portion of the conference.  This year was our second event.  At our first meet-up, there were about 30 of us tops in this small conference room in a hotel in Waco, TX.  Ginger Tapia set the whole thing up and it was wonderful.  It was there that an event was born.  This year, TAB Lab was definitely the place to be, as we more than doubled the attendance with 67 teachers.  And, I am happy to say that the secondary peeps went from about 7 or 8 to almost 20.  It’s a good time to be a Tx TAB teacher.

20180613_0952401374525972.jpg

Let’s get to it.  Our main meeting hall was the Frank Fickett Center  (FFSTC).  The hotel suggested it because the conference room was not going to hold us all.  It was a wonderful space to be in for 2 days.  The conference kicked off with one of our keynote speakers, Katherine Douglas.  She was unable to make it to Austin, so she spoke via interwebs.  Among the many fabulous things Kathy spoke of, she told us in regards to child art that “adult eyes need to learn appreciation for it”.  She also shared her 7 goals for her TAB studio and her students.

  1. Have an idea20180613_100200859648563.jpg
  2. Get materials and tools to explore idea
  3. Explore/Make idea, with false starts, change directions, mistakes
  4. Know when it’s finished
  5. Put away materials/tools properly
  6. Reflect/Share ideas
  7. Think about what’s next

Thank you Kathy so much for joining us.

That afternoon we went to visit some classrooms.  The elementary teachers broke into 2 groups–visiting both Julie’s and Lori’s classrooms in Pflugerville.  The secondary teachers made the long drive to Taylor to visit my classroom.  I am so happy they made the journey.  In spite of the 80+° room temp, it was an amazing experience.  I talked briefly about my journey, then we toured my room and how it was set up.  We talked about daily activities and classroom flow.  There was much conversation…conversation that lasted well past when I thought we would leave.


We went to dinner at Rudy’s BBQ and went back to the FFSCT for some more art chat and some Paper Smaché with the one and only Clyde Gaw.  Paper smaché is like paper maché, but Clyd-i-fied.


Our second day opened up with our second keynote speaker, Clyde Gaw.  I bet you thought he was just here for Smaché.   He was also here for the cardboard. In 20180613_092720-1358794459.jpghis presentation, he told us of his journey–his life journey–from the train tracks by where he grew up to his current job as a high school TAB teacher in Indiana.  It was interesting to me to hear how and when he met people I know (or know of), like Clark Fralick, Diane Jacquith, Kathy, NanHathaway, and John Crowe.  My biggest take away from Clyde that morning was the rhizome.  He likened things to it and called us rhizomatic. (def 1 def 2).  If you were’t at TAB Lab, but you are meeting up with Clyde at some other TAB event this summer, I’m sure he’ll talk about it.


The rest of the day included a working lunch, small group sessions, mini-presentations from attendees and 2 guest speakers, Priscilla Lamb and Manuel Gamez.  Priscella presented on Autism and Special Ed.  Manuel is the Fine Arts Director for PfISD.  It was interesting to hear the perspective of a non-teacher, someone in admin.  He very much supports the arts and really likes TAB.  Bonus for Lori and Julie. We ended the day with some gelli printing with Lori and some faux screen printing led by yours truly.  Unfortunately, after testing the screen the night before, I didn’t wash it fully and the prints weren’t as clean as I would have liked.  But, my fellow teachers were cool with it and didn’t complain.


After dinner, many of us met back at the hotel conference room and had some cookies, milk, chat, and arting.  It was a fun way to end the day.


20180615_1215441732492350.jpg

Friday was our last day and Lori had set up a great activity at Austin Creative Reuse.  ACR is a store that is supplied by donations.  It is a TAB teacher’s dream.  Well, and it’s the dream of artists and crafters and people that are into reuse.  We met in the classroom at ACR and split into 2 groups.  Those with the late birthdays went to the store first.  I have already been to ACR, so I knew what was up.  The others were new and were in amazement.  After shopping time, we went back and we participated in what was essentially like “Chopped”, but with art materials. We worked in groups of 4/5.  We were given a theme of “represent”.  And we went from there.  I was fortunate to get with a group where we all just flowed and worked well together.  Our sculpture was called “Bond”.


All in all it was a fabulous conference.  I am so glad that I was able to go and that I was enable to pass on my knowledge to others.  I know that I didn’t provide much of what I learned at Tx TAB Lab, but if you are curious as to what was shared, visit out Padlet.  It has links to almost everything.  I look forward to next year when I hope we go even bigger…it is Texas after all…Go Big or Go Home!  Until then, I have Facebook to be able to talk to my new TAB friends.


The 2017-18 School Year in Review

Standard

Another school year has come to a close.  That makes 11 for me.  The 2017-18 school year was a good year for me.  I had a couple of bumps in the road–that one student who felt she no longer needed to be here (luckily she is still here ♥) and the whole grading issue with me not being in compliance.  Overall, it was a fun and happy year.  So, without further ado, let’s take a look back and see what went down.

⇒ I entered 3 students this year into Scholastic Art and Writing.  We didn’t get any awards or even mentions, but I am proud that I was able to enter the work of these 3 young women.  I think we were robbed, but life goes on, right.

⇒ I was honored when Diane Jacquith and Kathy Douglas asked me to have a small part in the 2nd edition of their book, Engaging Learners Through Artmaking.  I speak of how I include current artists in my curriculum through an activity called Artist Monday.  Students watch a short video and then answer some questions about the artist and what they create.  Artists are always current, and many create art in ways that go beyond the traditional ways my students know about art making.

⇒I took my upper ceramic students on a field trip…on a Saturday!  It was so much fun.  We went to the Texas Clay Festival in Gruene, TX.  My students got to see a woman who was burnishing a pot and talking about terra sigillata.  They saw a variety of artists and got to see what people would be willing to pay for ceramics.  And, they got to watch a raku firing.  I am so glad that we went.  The fact that they were willing to give up a Saturday to go on a field trip was tremendous.  I hope to make this a yearly activity.

Seattle 2018.  This year’s NAEA conference was in Seattle.  I was lucky to be able to present not once, but twice at this year’s conference.  And bonus for me, both were with my very good friend and amazing TAB teacher, Elizabeth Honeysett.  We presented on Single Media and the TAB Classroom.  Liz talked about her jewelry classes and I talked about my ceramics classes.  We also did a ticketed event–The Secondary Choice Demo Room.  This was extra fun for me because I got to see adults make art.   Seattle was a blast.

FB_IMG_1522036718517.jpg

Restorative Discipline was brought into my school in the 2016-17 school year.  Each year they train a small amount of teachers.  I was lucky to be asked to be part of the 2017-18 cohort (cohort 2).  I really like restorative discipline because it focuses on relationships and community building.  It stresses being proactive instead of being reactive.  It was a great fit for me because I am all about relationships and community in my classroom.  We had many trainings throughout the year, which kept me always reflecting on my teaching.  I reflect anyways, but the reflections from the RD perspective made me think about things I sometimes gloss over.

⇒ RD brought the academic circle into my teaching practice.  In RD, there are many types of circle activities you can do with your students and the academic circle is one I really liked.  I utilized it in my ceramics classes.  There had been a disconnect between what my students researched on a artistic behavior and the art making that went along with it.  The academic circle filled the gap.  It allowed me to check what my students learned on their own. It allowed my students to share and connect with each other.  It allowed for questions.  It allowed for students to see ceramic art their peers were drawn to.  And, it helped to clarify the big idea for the students before they moved to the creation of their work.

⇒ I applied for a grant and was award it!  In our community, there is a Screen Shot 2018-05-27 at 11.42.27 AM
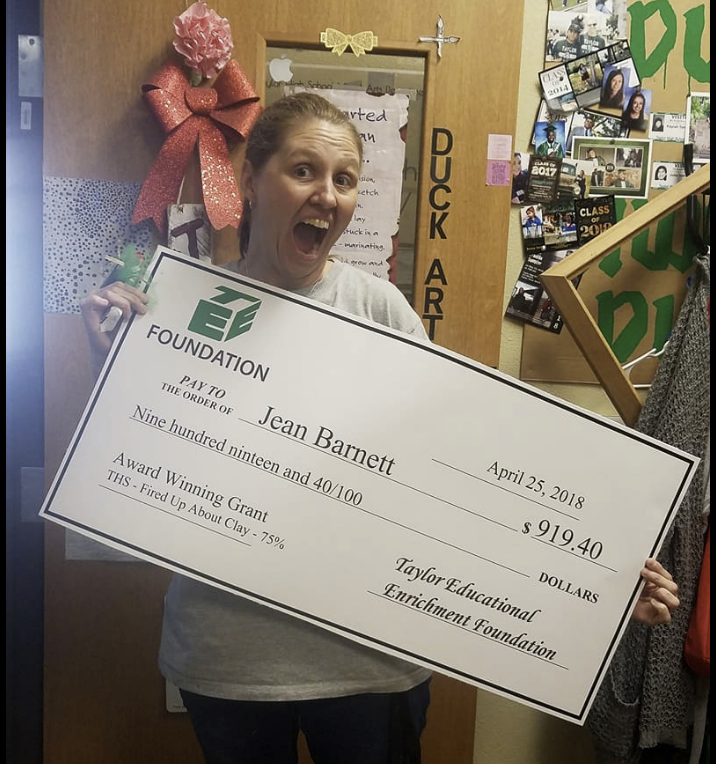
foundation called the Taylor Educational Enrichment Foundation (TEE) that offers thousands of dollars in grants annually.  I finally got the courage to write a grant proposal for a raku kiln kit.  When the day finallyarrived when we would find out who would be awarded, I’ll admit, I was nervous.  I heard the band and the cheerleaders coming down the hall.  I kept hoping they were coming to me and not going to walk on by.  My principal ducked his head into my office and told me to come out into the hallway.  I was so excited.  I was dancing around my classroom.  I have since ordered and received the kit and I can’t wait to set it up and teach my students how to raku this fall.

⇒For a few years, I make and gift some special seniors a piece of “Duck Art” pottery.  It started when some seniors bugged the crap out of me for cereal bowls.  So, as an end of year gift, I made bowls and gave them each one.  On the inside of the bowl, there was a duck.  The next year the seniors weren’t into cereal so much as they were coffee.  So, the image was transferred to a mug.  Each year, the duck image changed, but the sentiment was the same.  I made X# of mugs–all similar in shape, color, and image–and handed them out to the lucky ones I had forged relationships with.  This year, I wanted something different.  I really don’t like being a production potter.  I don’t like making the same thing over and over.  I decided to make each mug different and glaze each mug different.  The only thing that was my thru-line was the Duck Art medallion I made.  I made a sprig, which was a good lesson for the students, and went from there.  At the end, the students got to pick which mug they wanted according to their tastes and what fit well in their hands.  This has become the new and final senior Duck Art Mug.


20180521_1245161636134650.jpg

The Duck Art Mug!!

20180430_0817051451780997.jpg

The lefties

Those are really the bigs things that happened this year.  Like I said, it was a good year.  I made some stronger relationships with both students and colleagues.  I am sad that my ceramics seniors are gone.  They were a great group of kids.  But, I am excited for those returning next year.  I learned a lot about my teaching and how I want to move forward.  I really understand the end goal I have for my students–both those that will be with me for a year and those that will continue on.  I have worked hard (and continue to) on how to help my students meet those goals.  I have much in store for next year…I hope to implement “the 9”, courtesy of Ian Sands, with my art 1 class.  I have taken the 9 and created my own version–“the 10”–which is geared for my upper ceramics kiddos.  And, our principal decided to split the AP Studio art program between my co-worker and myself…so that will be interesting.  I am happy with my 11th year, and I look forward to another fun-filled TAB-tastic year in the Duck Art Studio.  But, until then, I will relax and enjoy my summer.

A New Approach to the Bootcamp

Standard

Well, it’s a new bootcamp approach for me and my students. Normally when we do bootcamps, there are many demos by me. And, since I don’t want to spend the whole class period doing demos, it ends up being one per day and then work time. So, each approach is learned separately. Granted, this has been okay for our drawing bootcamps and painting bootcamps. Last year I followed this approach for printmaking as well. It was kind of a disaster. Most kids didn’t really learn much, they whipped through each technique, and they wasted a lot of materials. So, this year, I decided we needed to do something different.

My school is 1:1 MacBooks, and it is an expectation that we include a technology component. I thought this would be a great way to meet that expectation and change up the bootcamp. This year, I would expect the onus of learning the techniques on the students. We talked about how this bootcamp would be different and that they were the ones to watch the demo videos for the technique they needed to learn. I would only be doing one demo–inking and pulling prints.

I create a Google Slides with my expectations for the bootcamp and shared it with my students in Google Classroom. At the start of the bootcamp, we went over it. I expected that each student would learn a minimum of one printmaking technique. They students could decide to either work alone or in groups of up to 4 people. Each group had to make 3 copies of an artwork that utilized different printmaking techniques. AND, they couldn’t repeat techniques in their piece. So, for example, a group of 4 had to create an artwork that had 4 different printmaking techniques. If you worked alone, you had to learn 2 techniques.

While I have 2 things I need to revise for next year, and I will get to those in a minute, I think overall this was a success. The majority of the kids watched multiple video demos before making decisions on what they wanted to learn. They communicated with others on the artwork creation and learned from each other when they had questions about techniques. Of course I had those that needed more attention than others, and I had some that needed modified requirements, but that is normal in a TAB classroom where differentiation is a common occurrence.

The biggest thing I have to revise is HOW I deliver the information and expectations to the students. The multiple copies aspect of printmaking was a difficult concept for many. I also want to look at the time line for next year. The students had 8 studio days (48 minute periods) to create and do a google slides for a presentation. I think I need to make it a full 2 weeks (10 days), not including a day for presentations.

I am proud of my students. They worked hard and learned way more than they realize. I plan on trying to incorporate this type of bootcamp into our future bootcamps. I am glad that I put the learning was put on their shoulders because it allowed me more time to observe and interact with my students.