Category Archives: Art 1

Exploring a Medium and Multiple Pieces

Standard

One aspect of a TAB classroom that gets criticized is when we allow our students to explore the same medium over and over and over.  Critics often think this is wrong that we TAB teachers don’t expose our students to a variety of media by making them do different projects based on different materials.  Unfortunately, this is not how artists work.  Yes, some artists work in several mediums…Picasso and Degas come to mind. Both painted and sculpted.  But, they came to other mediums because they wanted to explore, not because someone else told them to.  I am sure they were aware of other mediums, but they preferred what they preferred.  We do the same for our students.  They are aware of other mediums, but ultimately, they should work in the medium they prefer or what they feel is best to convey their idea.

On Mondays, I introduce my students to contemporary artists.  I want them to know what is being made in today’s art world.  While deciding on artists to have them meet, I found 2 artists that reinforce this idea exploring the same medium over and over.  First is El Anatsui.  Second is Elisabeth Higgins O’Connor.  I have included clips from both these artists.  If you click on their names, you can find the entire video.  Neither of these clips are about the art they make, but rather the message they are sending.

When we let our students continue to explore the same medium, they will begin to understand what it can offer.  They can push the boundaries of the medium.  They will understand what it means to research in an artistic sense.  They will behave like artists.

Artists Abstract/Don’t Represent

Standard

Normally I teach both abstract and non-objective art in a full-on unit.  This year I decided to revise that.  While I think the information included is important, it was information that could be learned in a shorter amount of time…with the right activities and check-ins.  I am lucky as our school is 1:1 and has a set of TVs at the front of the school that we can hook in to.

Day 1: Each class broke into 5 equal groups.  They brought one computer with them and we headed to the front of the school.  Each group hooked into a tv, and they were asked to first define both abstract and non-representational/non-objective.  After that, each group went thru a slideshow and determined if an image was abstract or non-objective, based on what they had discovered in their definition search. At the end of class, we went thru the slideshow as a whole class.

Day 2: We briefly went over the definitions of each style of art.  The students then were to watch 2 videos through playposit.  One video was on Joan Jonas and the other was Soo Sunny Park.  They students had to determine which artist would be considered abstract and which was non-objective.  They also had to say why.  This was really to stress the difference between the two genres and to let them see 2 artists at work.

Day 3:  At the start of class, we had a check for understanding where kids defined each term, said what they had in common and what made them different.  Then it was time for was our image find day.  Each student had to create a document that contained 10 images.  Five of the images had to be abstract.  Five had to be non-objective.  They also had to say why they chose those images–what drew them to those pieces.  I like having them do this because it causes them not to choose the first 5 they find and to really search through a ton of images.  Furthermore, it gives me some behind the scenes info into art they find intriguing.

Days 4-6: These were studio day.  Students chose which type of art they wanted to create, then had 3 days to create that art.  It was awesome.  The first day about 60% of students were working, but by the second day, 95% were working and not rushing thru.  I was very pleased with the conversations and the engagement by my students.

Day 7:  Our final day of the bootcamp was reflection day.  I asked students to fill out a google form.  I asked them again to tell me the differences and similarities between abstract and non-objective.  I asked them what genre their artwork fell into.  Then I asked some opinion questions about the bootcamp and abstract/non-objective work.  With the extra time left that period, kids could finish up anything they hadn’t gotten to over the past 3 studio days.

This was a huge success.  It wasn’t so long that they eventually lost interest. And, it was focused and narrow enough for 95% to understand the two concepts.

A New Approach to the Bootcamp

Standard

Well, it’s a new bootcamp approach for me and my students. Normally when we do bootcamps, there are many demos by me. And, since I don’t want to spend the whole class period doing demos, it ends up being one per day and then work time. So, each approach is learned separately. Granted, this has been okay for our drawing bootcamps and painting bootcamps. Last year I followed this approach for printmaking as well. It was kind of a disaster. Most kids didn’t really learn much, they whipped through each technique, and they wasted a lot of materials. So, this year, I decided we needed to do something different.

My school is 1:1 MacBooks, and it is an expectation that we include a technology component. I thought this would be a great way to meet that expectation and change up the bootcamp. This year, I would expect the onus of learning the techniques on the students. We talked about how this bootcamp would be different and that they were the ones to watch the demo videos for the technique they needed to learn. I would only be doing one demo–inking and pulling prints.

I create a Google Slides with my expectations for the bootcamp and shared it with my students in Google Classroom. At the start of the bootcamp, we went over it. I expected that each student would learn a minimum of one printmaking technique. They students could decide to either work alone or in groups of up to 4 people. Each group had to make 3 copies of an artwork that utilized different printmaking techniques. AND, they couldn’t repeat techniques in their piece. So, for example, a group of 4 had to create an artwork that had 4 different printmaking techniques. If you worked alone, you had to learn 2 techniques.

While I have 2 things I need to revise for next year, and I will get to those in a minute, I think overall this was a success. The majority of the kids watched multiple video demos before making decisions on what they wanted to learn. They communicated with others on the artwork creation and learned from each other when they had questions about techniques. Of course I had those that needed more attention than others, and I had some that needed modified requirements, but that is normal in a TAB classroom where differentiation is a common occurrence.

The biggest thing I have to revise is HOW I deliver the information and expectations to the students. The multiple copies aspect of printmaking was a difficult concept for many. I also want to look at the time line for next year. The students had 8 studio days (48 minute periods) to create and do a google slides for a presentation. I think I need to make it a full 2 weeks (10 days), not including a day for presentations.

I am proud of my students. They worked hard and learned way more than they realize. I plan on trying to incorporate this type of bootcamp into our future bootcamps. I am glad that I put the learning was put on their shoulders because it allowed me more time to observe and interact with my students.

The DuckArt Tantamounter: A midterm exam.

Standard

My school expects every class and every studeny to have a midterm exam.  I hate exams. And, without “testable content” in a TAB classroom, a written test was not really a good idea.  I’ve done portfolio reviews and semester learning questionaires before, but with art 1, they’re hit or miss.  I’ve done the “final artwork” thing before too, but I don’t grade artwork normally, so coming up with a rubric for one sucks.

Then it hit me. Why not do the Tantamounter.  I love doing it as an activity with my kids. We hadn’t done it yet.  It was a great way to show off the artistic behaviors and thinking I had hoped they had been learning…problem solving, communicating, collaborating, observation…and of course, it showed they could work in a shared studio as part of their task was to leave the studio as clean as they found it.

img_20171218_155225_767287580243.jpg

It was such a huge success.  I painted our living painting, much to the dismay of many who thought it was going away for the rest of the year, and put it outside our classroom.

Upon entering the room, the class was told they were now the inner workings of the tantamount machine. After a brief slide show, a statement about materials, and time for questions, time began–they had 60 minutes.

Seriously, it was awesome.

I do want to thank my coworkers for bringing such interesting items to be Tantamounted.  I couldn’t have pulled it off without them. I have decided this is my go to midterm from now on.

Artists Steal?

Standard

Every year I do a unit based around copyright called “Artists Steal”.  We learn about appropriation, fair use, parody, and copyright infringement.  And, every year I do it the same way…  Lengthy power point where I drone on and on about each “topic” with case studies for each.  It takes the whole period, and I know that by the end, kids have just plain zoned out completely.  After the Powerpoint, the kids do a challenge of an animated character remix and finish with their own artwork…following the rules of copyright infringement.

This year, I decided that I needed to change things up.  First and foremost, I made the unit into a boot camp.  It takes only a week.  2 days of learning about copyright.  And 2-3 days for the character remix challenge.

On day one, I showed the video for David Bowie and Queen’s “Under Pressure“.  Then we watched Vanilla Ice’s “Ice, Ice Baby” video.  We ended the video fun with a short interview with Vanilla Ice from MTV.   We briefly discussed how Vanilla Ice was in violation and I told them the outcome of the case–an out of court settlement of an undisclosed amount.  That helped me to segway into the next portion of the boot camp–group work.

I told my students that copyright applied to visual arts as well, and that there were 4 topics we were going to learn about.  I then divided the class into 4 group and assigned each group a topic–copyright, appropriation, fair use, and parody.  Each group was given a laminated card with the textbook definition of their topic and a case study for that topic.  The students were asked to put the definition into teenager vocabulary so the rest of the class would understand.   Then they were to read about the case, and based on their topic, decide what the outcome of the case should be and why they felt that way.

The following day, each group presented their topic to the class.  I read the textbook definition, then the group would translate that into teenager vocab.  I projected the images for their case study.  The students described the case to the class and told us their decision on what the outcome should be.  The rest of the class then had the option to agree or disagree and give reasons why.  Finally, I told them the real outcome.

After the students finish their character remix challenge, which they will do in their sketchbook and put a photo of on our class seesaw feed, we will discuss one more case before moving onto another artistic behavior unit….Banksy’s Dismaland.

I am really happy with how the boot camp went.  I rather enjoyed not being the one to teach them. The students listened to each other, had opinions, and even changed opinions after hearing what others had to say.  I think they learned more this way than when I would teach it all.  I hope they use the information they gathered from this as we move forward with our art making this year.

Reflection and the Final Survey

Standard

Every other year, I like to provide my students with a final survey to see where they are at and to gain some insight on my teaching from the students POV.  If you don’t already do this, I highly recommend it.  I think you will be pleasantly surprised by the data you receive.  (Also, it’s nice to hear that our students love us every now and then. 😉 )

I created several google forms, breaking them up by class.  I think there are different things to know from the different students.  The insights of a student that has had you for 3 or 4 years is way different than that of a first year student or a student that was only there for the fine arts credit.  Also, if you have a single media class, you can form the questions to reflect that.

“What I liked most about how you ran our art class was how you had a great relationship with your students and your class was the class everyone looked forward to everyday.”

” you’ve taught me not to judge people for who they are”

“I learned that you have to trust yourself and learn to take risks.”

“I think when you pushed us we got better”

I asked a variety of questions, ranging from the students telling me their strengths and weaknesses to how they felt about my teaching methods.  I asked what they liked and what they didn’t like.  I asked what they had learned and what they wished they had learned.  I also asked what I could change.  Kids are pretty honest.

“the artworks we did were fun because we could do what ever media we wanted to do as long as we could fit the needs of the project”

“I liked how we had the prompt or whatever and then you allowed each individual person to take their time to make their art and you helped each person with their specific questions.”

(Favorite part of class) “being able to use a lot of the equipment freely” & “being able to talk to you about anything”

One thing that I think is important when creating the forms is to make almost all questions as required.  It makes the student think and add to previous answers. The only ones that are optional are “Name” and “Anything else you would like to add”.  If a student thinks he can be more honest by remaining anonymous, then that is a good thing.

(I’ve grown as an artist…) “because when I run into a problem I can figure out a way around it instead of getting frustrated and starting over again”

“You ran [class] like were weren’t just kids and you trusted us to use the tools effectively and whenever we wanted.”

“I loved that you would give us a broad topic to help get an idea of what we want to make our art of, but what we actually made was up to us. So we had freedom in our art.”

“I loved that you gave us a topic that we had to base our artwork on, but that you didn’t push us into doing anything. You let us create the artwork that we wanted and let us use whatever media we wanted”

As I sat this morning finally reading their responses, about a month after they filled them out, I made some notes.  I jotted down some of the things they liked.  I jotted down what they wished they had learned.  I made notes on things they felt would have helped them grow more.  I even wrote down some quotes that I didn’t put in this post. And, I have to admit, reading their words about how much they enjoy the TAB studio/pedagogy really helps to solidify that I made the right decision when I made the switch.  I’ve been TAB for several years, and I rarely doubt the decision to go ther, but it is still nice to hear from those that it truly affects that it was a good thing.

I am glad that I waited a month to read the responses.  Enough time has passed that my mind is fresh, but it hasn’t been so long that I can no longer hear the voices of my students in their responses.  This list will help me when I go in about a month to work out things for next year’s classes.  I can know what is missing, and what not to change.  Now, I don’t agree with everything they said.  I know some kids didn’t like writing about the artists we learned about and some didn’t like the computer stuff; that I won’t change because I do think it is important for their artistic growth…they just don’t see it at the moment.  But, I was surprised by how many liked learning about current artists and how many actually liked the drawing tests.

I have been doing surveys for as long as I have been teaching, but I think this year’s surveys were the most informative.  I think I finally asked the right questions and got responses that will be able to help me create a better studio and learning experience for my students.

“Most people just take art because they need a year of fine art and honestly that’s why I took art, but as the year went on I started to really love this class and making artworks.  I can’t wait to have art again next year!!”


2016-17 Year in Review

Standard

It’s that time.  Another school year has come to an end.  And, in honor of me finishing out my 10th year, I will count down the 10 biggest things that happened this year.   Not everything that happened this year was good.  In fact, it was kind of a crappy year.  But, I did learn a lot and made some great relationships with me students.  So, without anymore drivel from me, let’s do this.

10. UNITY:  I will admit, I saw the Unity Project video on Facebook, and I was in.  I emailed my principal and he was all in.  I created a gofundme project for it and through the kindness of others, the project was funded quickly and I was able to go shopping for materials.  It was a great way to kick off the year.  I had so much support from other teachers and our student body.  While there was a few hiccups along the way (one being when a students thought he could climb on a pvc pole and he broke it), in the end, it was an amazing installation.

9. THE PURPLE HOODIE: I had a tough student this year.  He was hard to reach.  He didn’t talk much, and he often had his purple hoodie pulled up over his head.  I started the year off by giving him some space, and by asking his monitor teacher for some strategies with him.  It took a while, but we built a relationship.  He spent much of his time during his class in my office, but he would do the work I asked him to do.  And believe me, he did not like making or talking about art.  After a while, he would come in during lunch to hang out and chat.  He did this at other times as well.  We built a relationship where I could be honest with him and give him a fair dose of snark and it was all okay.

There was this one day that was bittersweet.  It both made me sad and touched my heart at the same time.  He came into my office one morning during tutorials, but there were already like 6 other kids in my office.  I said hi, and he looked at me, but then left as quickly as he came in.  I sensed something was off.  I figured I would ask him later that day.  He didn’t show up to class.  When he returned the next day, he told me where he was…talking to some people in the office.  When he told me why, I was saddened.  I won’t go into details about why.  And I know this is weird, but it touched me that I was the 2nd person he came to find to talk with him.  The first wasn’t in her office, so he came to me. I care very much about this young man.  And, I am glad I gained his trust.  Sadly, he has moved to another city with his father.  But, rumor has it, he will be back next year. Relationships can sometimes matter more than art making.

8. ESCALATION: I have a co-worker that has been teaching with me for the past 10 years.  We get along on the surface, but when you look closely, you will notice we couldn’t be more different.  For starters, we teach on complete different ends of the art spectrum…he’s dbae and I’m TAB.  We don’t play well together and it has been building up for years.  I finally got up the courage to talk to an admin about the situation; I went in with the intention of seeking advice in how to make our department better and how to work with him.  It was suggested that we circle up, a restorative discipline term.  Basically, it was like mediation.  He basically refused, and one day it escalated between us in my classroom.  Luckily, I was on conference and I held my cool. We still haven’t worked things out, and I have been told our head principal will eventually talk with us, but I’m not holding my breath.

Why am I adding this?  Well, this was a big event that happened this year.  I think it needed to happen.  I would have liked to go to mediation, but I am mostly okay with the outcome.  The fact that I spoke up and I was honest about my feelings and that I took ownership that I wasn’t innocent in any of it was big for me.  I don’t like confrontation, nor to like to create waves in my workplace.

7. SCHOLASTIC ART: This year, I finally got up the nerve to enter my students work in the Scholastic Art contest.  I was so nervous.  I see the potential and awesomeness in my students’ works, but do others.  My kids don’t make “normal” pieces, and often times it’s not what “they” consider gold seal work–one reason I don’t enter into our state art event.  But, I was told Scholastic was different.  My kids didn’t win anything, and after looking at what did win for my region, I wondered about the judges.  But, that is neither here nor there.  I am so proud of my students for trusting me.  I still think they were shafted because their work was super cool.  I know, I’m biased.  I look forward to next year and entering more student works.

6. DALLASThis year’s Texas Art Ed Assoc held it’s yearly conference in Dallas.  I presented not once, but twice.  I presented once about grading and TAB…it kind of bombed.  I was told it was fine, but I know better.  The other presentation was a overview of HS TAB.  It went really well.  Beyond the presentations, I participated in my first live twitter chat, got to have great burgers and beer with a friend who I met in Chicago at NAEA16, I met the terraforma cards guys, and I got to throw some bowls for a local empty bowls event.  It was a pretty fun time, I must admit.  It was a much needed and much appreciated work-cation.

img_20161117_153704.jpg

5. THE BIG APPLE NAEA17 was held in my old stomping ground…NYC!  There was no way I was going to miss a chance to go “home”.  I don’t even know where to begin.  I got to room with 2 of my favorite TAB ladies.  I got to finally meet and hangout with Melissa Purtee.  I stayed in a hotel in midtown.  I lived in Queens, so the hotel stay was new and so cool.  I got to go to the MOMA, which is in a completely different location from the last time I went there…over 20 years ago.  I had a fabulous dinner with other TABbers, provided by my fabulous mentors, Diane and Kathy.  Times Square had become something I couldn’t believe…so bright and shiny.  And, I got to have a reunion with one of my closest friends from college.

4. 4th Annual THS Art Show:  Six years into my time at THS I asked if we could have a high school art show.  Up until that point, there wasn’t any.  This year marks the 4th year that I have put up a show that celebrates all art made at our school.  I don’t just show off my students and my co-worker’s students.  We include any other elective where art is created–welding, fashion, photography, floral design, culinary, and we include our teachers.  It is a lot of work, but in the end, it is so worth it.  This year I was worried that it wouldn’t go off well.  (See the escalation paragraph above.)  But, I put that aside and just focused on the art.  I think it was a great turn out.  Students sold their work, and not just to their parents.  The rain stayed away (every year it rains at the beginning of the show) during the show itself; I do believe it rained earlier in the day though.  I found a better way of hanging the paintings, almost none fell down this year…the rain always brings the humidity and that doesn’t play nice with how we used to hang out artworks. Granted no one from central office showed up, even though they were sent formal invitations, but I’ve come to expect that.  And quite frankly, those who are important, like parents, friends, teachers, and the community, showed up in support.  I look forward to celebrating our students again for years to come.

art show poster (1)

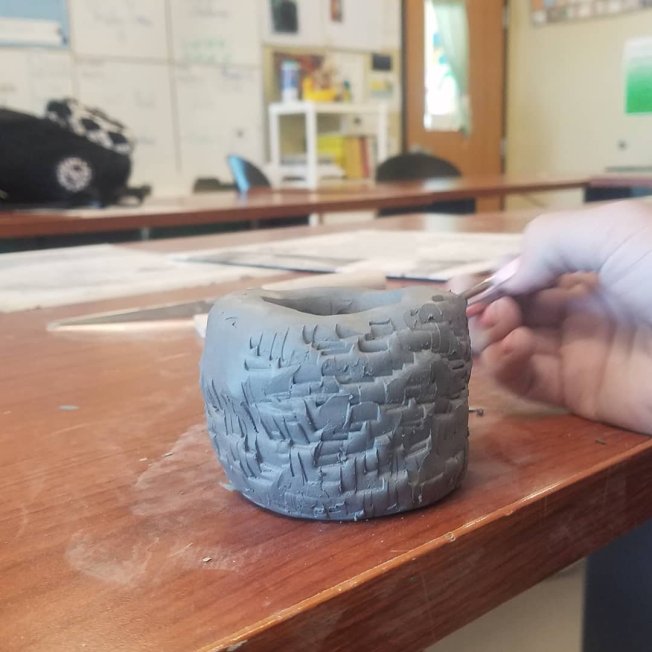
3. A SMILE LIKE I’VE NEVER SEEN: Art is a funny yet fabulous thing.  It can grab hold of the most unlikely and unexpected people.  This year I was lucky enough to witness this.  I watched a student finish a project early and ask me if I could show him how to use the wheel.  We weren’t slated to use the wheel for months, but who am I to stop a student from learning to art.  That week, I knew art had put her hooks in him.  Over the next few months, I watched him grow, and learn, and create.  I watched him create bowl after bowl, vase after vase, each time honing his skills, and using every ounce of clay we had.  But, it was more than that.  I saw the passion for what he was doing rise in him.  I saw a smile, and a light in his face when we talked about ceramics and his work.  I am so glad that he decided to sign up for beginning ceramics.  If only he found it before his senior year.

2. RESTORATIVE DISCIPLINE: Our school started to implement a new behavior management system.  It is called restorative discipline, and for the most part, it is meant to be proactive instead of reactive.  It is not something that the entire campus learns at one time.  It is done in stages.  I know that seems odd, but after learning about it, it makes sense.  I was lucky enough to have been asked to be in cohort #2, which began it’s training 2 weeks before school ended.  It is so much about community and building relationships…which is right up my alley, and why I was asked to be in the 2nd cohort.  I personally think it was cool to be asked knowing why they asked me.  (Some were asked because they thought that teacher was lacking in that area.)  Anyway, so far, so good.

But, more than being part of the next cohort, I did participate in a couple of tier 2 circles this year…these are reactive, but they can make such a difference.  I had one student who I kept butted heads with, and if she kept it up, we knew she was headed to our alternative center.  We circled up and we both spoke our piece and listened to the other person.  We made a contract and tried to implement it.  We hit a bump and had to re-circle.  But, that time worked.  We now have an amazing relationship, and don’t tell her, but I will miss having her in class next year.

1. NO MORE THEMES: This year I dropped the themes for my art 1 and art 2 classes.  I instead went with artistic behaviors for major units.  We worked our way through: artists solve problems, artists communicate, artists, observe, artists steal, artists represent, artists abstract/don’t represent, and artists work in a series.  This was a major step forward for me and my students in our TAB studio.  I think it really was more meaningful to them to really understand what artists do.  It really made a huge difference, the switch that is.  I could see it in their work; I could see it in their exploration; I could see it in their understanding of art making; and I could see it in their growth.  And, at the end of the year, I had the least amount of work left behind I have had since making the leap to TAB.

IMAG1038_1

It has been a very interesting decade of art teaching for me.  I have changed so much.  My teaching has changed so much.  I like to think it’s all for the better.  I keep learning new things, about art, about teaching, about students, and most importantly, about myself.  I often wonder what is going to happen next, which is something that keeps me interested and wanting to go to work every day.   What obstacles will I face and will I overcome them?  What new things will I learn?  What new things can I teach someone?  What new relationships will I make?   What new surprises will I find?  I think it’s this last one that I really enjoy because I love being surprised by what my students do and learn and create and tell me.  It is what makes it all worth it.

Printmaking Exploration

Standard
Printmaking Exploration

I decided to start the second semester off with some good old exploration.  I was going to jump right into my “Artists Steal” unit (appropriated from Apex HS), but then I changed my mind and thought we needed to get messy for a week and a half.

We don’t have a printing press at school, so that limits what we can do.  However, that didn’t stop me from coming up with 6 different techniques involving making prints.  I got this idea from Cynthia Gaub and her art around the room activities.  The students would be asked to explore 5 out of 6 techniques and reflect on each technique.

I set up the counter with the 6 different “stations”.  We would learn about block prints (with EZ cut), collograph, stamping, styrofoam plates, monoprinting, and faux screen printing.  I laid out the week and a half in a short PowerPoint, explaining I would only do demos for cutting blocks, inking plates/pulling prints, using the gelatin plate for monoprints, and how to set up the screen for screen prints.  For the other techniques, the students would have to rely on the example cards I had created the year before.  Some of it required some thought on their part on interpretation of the card.

The students were asked to reflect on their findings of each technique.  They could either write their answers in their journals/sketchbooks or they could start a new BlendSpace lesson and reflect there.  I gave the students 7 questions to choose from…they have to answer question #1, then pick 4 from the remaining 6.

  1. What was the medium/technique explored?
  2. What qualities/characteristics does the medium/technique have?
  3. What makes the medium/technique different from a similar medium/technique?
  4. What did you like the best about media/technique and why?
  5. What did you like the least about media/technique and why?
  6. What could you use this medium/technique for?
  7. What other information would you like to know about this medium/technique?

My favorite part was reading the variety of questions they had for #7.

  • How is this art? (re: screen printing)
  • Is there an easier way to reverse when doing blocks?
  • Could block printing be done on a larger scale?
  • Was styrofoam printing invented by someone on a budget?
  • Who came up with block printing?
  • How do you add multiple colors?
  • What can you do with the collagraph technique?
  • Why is it called collagraph?
  • What is the right amount of ink?
  • How do you keep ink from getting on certain points on the styrofoam plate?
  • What other tools can be used to dent into the styrofoam?
  • How many layers can you do on a monoprint?
  • Do people really use the collograph technique and make a living with it?
  • How can you draw cleaner in the styrofoam?

Here are my thoughts on this activity:

I really think this could be a good way to explore different ways of printmaking.  While I showed the students some examples of final pieces, I don’t think I really let them know “how” different type of printmaking could be used.  They tend to think that each technique must be used alone and don’t consider mixed media, texture, background, layers, etc.  So, I would figure out a way to bring that into the activity for next year.

When it came to leaving some of the work to them…  relying on the example cards I had created the year before, I was hopeful that they would figure it out…I was wrong…most didn’t and they ended up asking me.  Sometimes they didn’t even try to look at the cards and make some educated guesses at what the process was.  This was frustrating to me as part of my philosophy does have the expectation that the students are responsible for their own learning and that I won’t spoon feed them.  I know they are high school students, but that can’t be their excuse for everything.  I did find myself smiling when I would hear a student asking another student.

I think perhaps I could show some videos or require them to watch a video as part of each station so they could see other artists use the technique or see what it could be used for. Then, they could use that as well for more informed reflections of the techniques.

My other thought, and this happens every year since moving to TAB, is how to get kids to actually use printmaking/stamping in their artwork.  Do they really not like it?  Do they not see it as an artwork?  Do they (the students) see it as too much to add to their process when art making?

I will continue to do this Printmaking Exploration Activity, but I will make some needed adjustments to enhance the learning and the take-aways from the activity.  One adjustment might be some requirement of what they need to create from the prints…so they put more thought into what they are doing.

Since originally writing this, I did have one student revisit monoprints and the gelatin plate.  She really enjoyed the process and was glad she was able to use it again when creating a non-objective piece for our “Artists Don’t Represent” unit.

Artists Communicate

Standard

Our most recent, and final artistic behavior unit, was a closer look at the behavior, Artists Communicate.  This unit was set up a little bit differently than the other units.  We didn’t do as many activities prior to the artwork.  And, this was the first unit where my students created their own original artwork…from conception to artist statement.

We started off with a video on an artwork/installation piece by artist Maxwell Rushton.  As a little background, on Mondays we do what I call “Artist Monday”.  I show a video ranging in length from 3 minutes up to 10 minutes about a current artist.  (Artists Have a Global Awareness of Artmaking) When I choose the video we will watch, I try to keep it in line with the big idea of the current unit.  So, back to Maxwell Rushton.  He created an installation called “Left Out“. It communicates a message about homelessness and our perception of the homeless population.  Students reflected on the video on their BlendSpaces.  Another video I showed over the course of the unit was about Latina printmaker Kirsten Lapore.

One other short activity my students did was a simple sketchbook assignment.  They were asked to break one of their sketchbook pages into 6 boxes.  In each box they had to convey a certain idea–without using the items in the description.  Descriptions included: smell of a fresh baked apple pie, feeling of loneliness, sound of an approaching train, the taste of a hot pepper, the feel of lambskin, and an alarm clock at 5am.  The activity forced students to think of line, shape, and color when creating their sketches.

screen-shot-2016-11-27-at-8-40-48-pm

We spent a day, which probably was really boring until about half-way thru the slide show when the students got to participate.  I showed a slide show that also touched briefly on planning and research.  (This was the boring part.)  Then we got to the communication part and the slide with 5 photos of artworks.  We discussed what they thought the meaning was.  I talked about what the artist intended.  Then we discussed what the artist did to convey those ideas and messages.

screen-shot-2016-11-27-at-8-40-35-pm

That night, after a full day of that slideshow, I realized that the works I chose were very heavy with meaning.  I wanted my students to know that artists also communicated other things that weren’t so steeped with deep meaning.  Here is the pinterest board with the images I chose.  I set up Padlet boards for each class, and one by one I would put up an image and the students would chime in with what they thought the artist was saying and how they determined that.  I was impressed with my students.  They really read the images well.  It lead to great discussions.  As things were posted, I would say some things out loud and ask questions.  I could see the students contemplating, then some would reply out loud with their thoughts.

screen-shot-2016-11-27-at-8-40-18-pm

This brought us to studio time.  My young artists were asked to fill out an artwork proposal for what they wanted to create.  My students really put a lot of thought into their work.  Some students knew what they wanted to communicate, but didn’t know how to convey that.  Others knew what they wanted to make, but didn’t know what they wanted to say about their image(s).  That’s where the meetings came in.  When a student turned in their proposal, I read over the form and wrote down questions and comments.  Then I went and talked with each student.  It really helped me to understand their thoughts, and it helped them to see what “tools” to use to help convey their message…colors, line, composition, viewpoint, symbols, etc.

screen-shot-2016-11-27-at-8-40-59-pm

One thing that I was really impressed with was how much my students prepared for their final artworks.  Some gathered photo references.  Some did sketch after sketch trying to improve their skills.  Many watched videos to learn new skills–such as drawing and shading eyes.  I had students trying out new mediums.  They were all so into what they were doing.  They put so much into their artwork.

screen-shot-2016-11-27-at-8-41-08-pm

Anyway, we concluded the unit by setting up weebly websites/blogs.  I wanted my students to have an online portfolio; something different than the BlendSpace.  I see the BlendSpace as a place for research and collecting thoughts.  The websites are for finished artworks with artist statements.  They are something where they can show off their work.  We learned about artist statements and looked at statements by my artist friend, Roger Mudre, and at my artist statement.  So, now when my students finish an artwork, they take a photo, write an artist statement, and create a new blogpost.

For the first time in a long time, I felt my students’ artworks were at the same caliber as those from the students from my peers, such as Joy Schultz, Ian Sands, and Melissa Purtee. Their students always seem to have so much depth in their art, and now my kids did too. Proud teacher moment, if I do say so myself.  I hope we keep up this momentum because I can only imagine how amazing my students will be by the end of the year.

Artists Solve Problems

Standard

Our second in-depth look at an artistic behavior in Art 1 classes was “Artists Solve Problems”.  For this unit, I really wanted to give my students a chance to create some art, while figuring out how to overcome a problem or problems.  I feel this is a very important skill to have for life…not just for art making.

We started off the unit by watching the TED Talk by Phil Hansen, “Embrace the Shake”.  Most students really enjoy watching this video.  They are intrigued by how Phil fulfills his need to create while overcoming his perpetually shaking hand.

Our next activity came to my from my friend and fabulous art educator, Melissa Purtee.  Earlier in the school year, she wrote about game she played with her student on the first days of school called “What’s in the Bag?”  I read her post and thought this would be a great activity for students to begin working on problem solving skills.

I created 6 bags for each of my art 1 classes.  That required my students to break into 6 teams of 4…no one was allowed to work alone. (Working together in a group was another problem to solve.)  Each group picked a prompt from the bucket and then received their bags.  They were given an hour (broken up over 2 classes) to bring their prompt to life.  Bag contents included: a portion of an egg carton, 3 pipe cleaners, a cork, a round plastic piece, 10 popsicle sticks, 2 tongue depressors, some puzzle pieces, 3′ strip of lollipop wrapper, 3 small square chipboard pieces, and 2 rectangular chip board pieces.  They could also use the bag if needed, but it was not required.

After time was up, students were asked to present their creation to the class, addressing the following topics:

  • What was your prompt?
  • Talk about your creation BEYOND “this is my project”…DESCRIBE IT!
  • What was the hardest problem to overcome building your creation?
  • How did you overcome it?
  • What was the best part of this activity?

Lastly, each class took a closer look at the creations and then voted for the 2 they best felt fulfilled the following criteria:

  • Best interpretation of the prompt
  • Best visual appeal
  • Best craftsmanship
  • Best use of materials

I also showed a few other videos along the way for kids to see how real life problems could be solved in fun, artistic ways.  The videos came from The FunTheory site.  Thanks Ian Sands for showing me that one.

Our final activity of this Artist Solve Problems unit was SCAMPER.  I learned about SCAMPER while at a Gifted and Talented training this past summer.  Out of all the different activities we went over at the training, I felt SCAMPER was one that I could actually take back to my classroom and have the students use.

I wanted my students to create an artwork, on their own, but I wanted it to fall under this unit.  I thought with SCAMPER I could kill 2 birds with 1 stone so-to-speak, as I have a ton of old student artwork that I no longer needed or wanted.  So, this was a great time to use them.  Students will pick an artwork from the pile and use it to create a new artwork.  The catch is, they have to choose one of the letters of SCAMPER when creating their  “new”artwork.  Subject matter, medium(s), and technique(s) are all up to the student.

S = SUBSTITUTE

C = COMBINE

A = ADAPT

M = MODIFY

P = PUT TO OTHER USES

E = ELIMINATE

R = REARRANGE

Modify was the letter most used in the activity. But, a few really dug in with combine, rearrange, eliminate and put to other uses.  I wish I had some of the before images, but I don’t.  Oh well.  Anyway, they stepped up with SCAMPER–some students taking the artwork so far off the original…YAY!  One student totally took her piece apart and created a whole new piece.  (The feathered bird above–it was once a rhino.)  One note I did have for myself for next year is to have a wider variety of old artwork for the kids to choose from.  Too many of the same starting image and ending with not changing the image enough.  Thanks DBAE. Live and Learn.

As we have moved on from this unit, I can see my students talking with each other and trying to work through problems on their own first before involving me.  This is huge.  It leaves me more time to walk around and chat and get to know my students.